 VanGami.com
Mini Weekly Planner
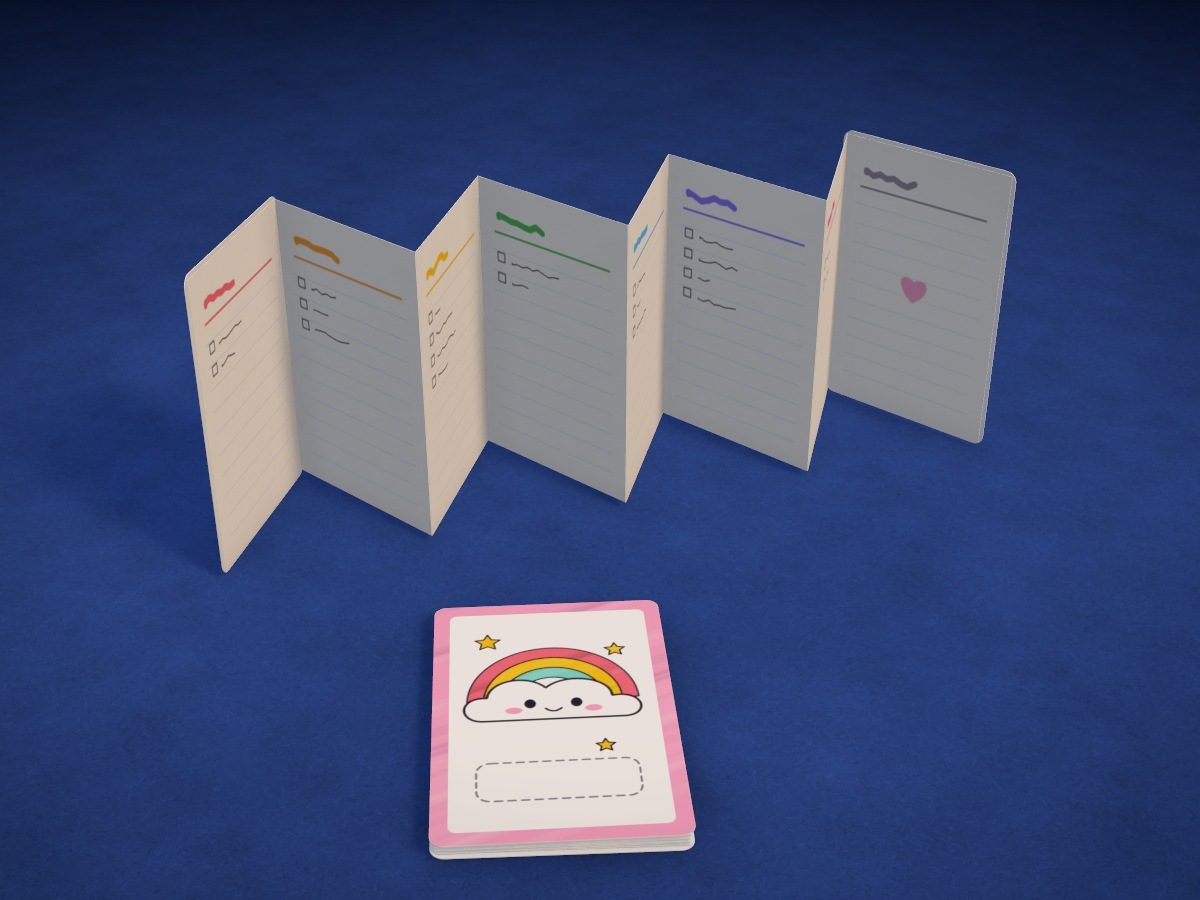
A palm-sized accordion booklet: seven pages for the days of the week and one for notes, in a cover with a rainbow and a smiling little cloud. It opens out into a strip and stands on the desk in a zigzag.
- Easy
- 8 pages
- 7 days
- 2 Letter sheets
Make it with your phone cameraLesson code: 1120
On VanGami the template appears over your sheet through your phone camera — no printer needed. Trace it, cut, fold and glue. Below are all the steps in text.
What you’ll need
- 2 Letter sheets — office paper, 80 gsm (20 lb)
- Markers
- Pencil — and eraser
- Scissors — small
- Glue stick — or PVA glue
- Tape — clear
- Glass — phone stand
Steps
Sheet 1
- Sheet 1: white sheet for the covers. The white sheet for the covers should be under the camera now. The template has 1 sheets.
- Cover: outline. Trace the rectangle with rounded corners using a solid line — you’ll cut along it.
- Cover: drawing. Copy with thin lines: a frame along the edge, a rainbow of three arcs, a little cloud with eyes and a smile, three little stars and a frame for the title at the bottom.
- Back cover: outline. Trace the second rounded rectangle the same way. You don’t need to draw anything on it.
- Color: cover. Frame — pink; rainbow arcs — red, yellow and mint; stars — yellow; cheeks — pink; eyes — black. The cloud stays white; you’ll write the title in the frame at the bottom later.
Sheet 2
- Sheet 2: white sheet for the pages. Take the white sheet for the pages. You don’t need the camera here — follow the diagram on the screen.
- Pages — follow the diagram. You don’t need to draw anything on this sheet: you cut it in half along line 1 and fold it accordion-style — every fold in half, edge to edge. You’ll do this at the “Pages” stage.
Cut
- Cut out: cover. Cut out the cover along the solid line, rounding the corners along the curve.
- Cut out: back cover. Cut out the back cover the same way.
Pages
- Cut the sheet in half. Place the white sheet with its long side toward you. Fold it in half — bottom edge to top edge — crease the fold and unfold it. Cut the sheet along the fold: now you have two long strips.
- Accordion-fold it. Fold each strip in half, short edge to short edge, and unfold it. Fold both edges in to the middle fold and unfold. Fold the middle crease the other way — you now have an accordion of four pages.
- Join them with tape. Unfold the accordions and lay them end to end, with the same side up, so the folds keep alternating across the join too. Tape the join with a strip of tape on both sides — now you have a strip of eight pages.
Glue
- Covers. Fold the accordion into a stack. Put glue on the back cover and press the stack onto it. Then put glue on the top page and glue on the front cover design side up — the edges should stick out evenly.
Write
- Label the days. Open the booklet. At the top of each page, write the day with a marker: Mon, Tue, Wed, Thu, Fri, Sat, Sun, and “Notes” on the last one. On the cover, in the frame, write the title and the week.
Check
- Fold and open. Fold the booklet and open it again: the pages lie in a neat stack, and the opened accordion stands on the desk. Carry the planner in your pencil case.
Done. Your planner is done. Open it out as a strip — the whole week is right in front of you; fold it up and it goes into your pencil case.
Make it with your phone camera
 Mini NotebookEasy
 Corner Bookmarks: AnimalsEasy
 Sugar Skull BookmarkEasy
 Candy Cane BookmarkEasy
 Clip Bookmarks: Heart and StrawberryEasy
 Corner Bookmark: Little MonstersEasy