 VanGami.com
Paper Gun
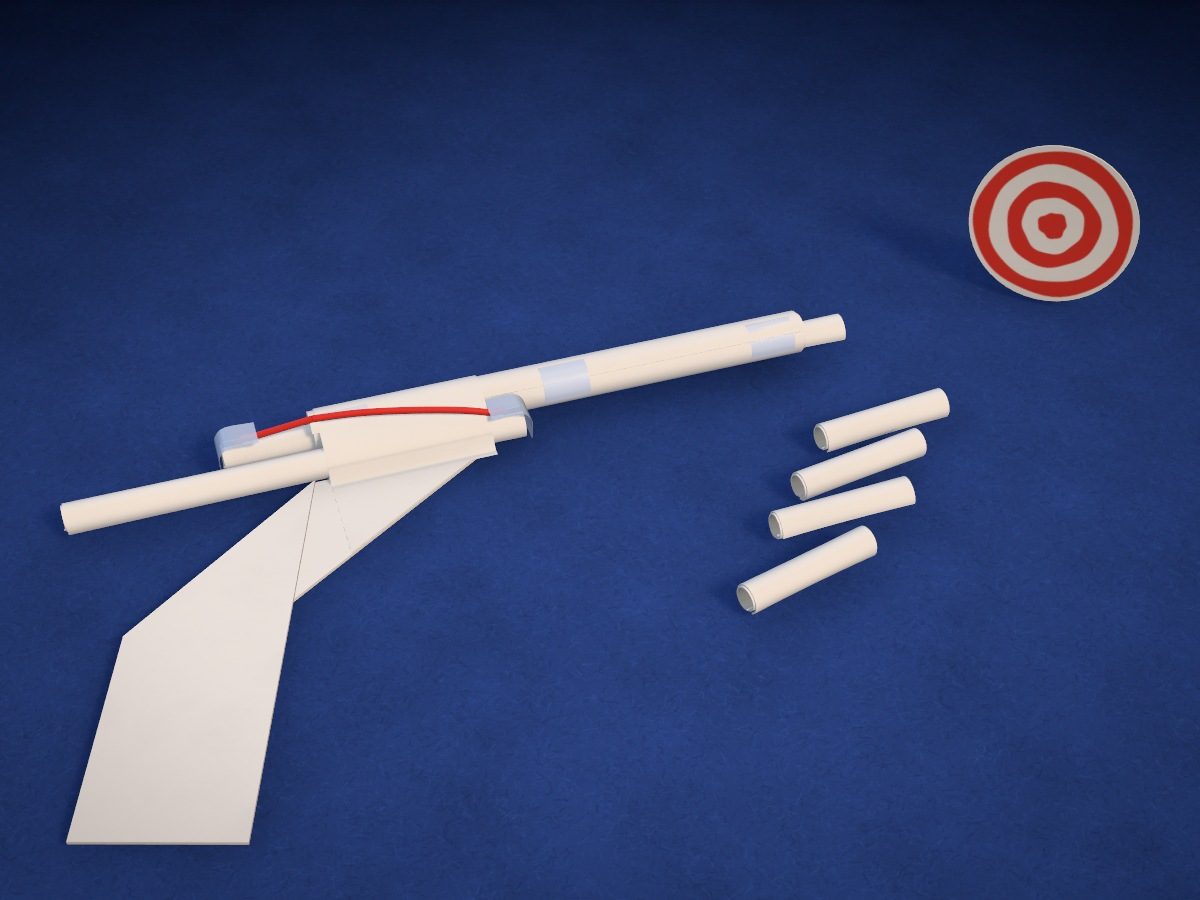
A gun made from three sheets of white paper. The barrel, plunger, and rail are tubes rolled on pencils; the frame with the grip is a sheet folded in four. A rubber band pulls the plunger forward, and the plunger knocks the bullet out of the barrel. It comes with five bullets and a target on a stand.
- Medium
- 3 Letter sheets
- 3 tubes
- 5 bullets
- 1 rubber band
Make it with your phone cameraLesson code: 9435
On VanGami the template appears over your sheet through your phone camera — no printer needed. Trace it, cut, fold and glue. Below are all the steps in text.
What you’ll need
- 3 Letter sheets — office paper, 80 gsm (20 lb)
- Markers
- Pencil — and eraser
- Ruler — 8–12 in
- Scissors — small
- Glue stick — or PVA glue
- Tape — narrow, clear
- Rubber band — about 2⅜ in across
- Second pencil — same as the first: about ¼ in thick, at least 5⅞ in long. You roll the plunger, rail, and bullets on one pencil, and the barrel on two together
- Glass — phone stand
Steps
Sheet 1
- Sheet 1: barrel sheet. The barrel sheet should be under the camera now. The template has 3 sheets.
- Barrel and plunger. Trace two pieces with a ruler: a 5⅞ × 5⅞ in square for the barrel and a 5⅞ × 3⅞ in rectangle for the plunger.
- Glue strip. Draw a line ⅝ in from the top edge of the rectangle. The strip above it is the glue area: you’ll roll toward it. The square doesn’t need one.
Sheet 2
- Sheet 2: bullets and target sheet. Remove the previous sheet and put the bullets and target sheet in its place, lined up edge to edge. Don’t move the phone — the scale stays the same.
- Rail and bullets. Trace with a ruler: a 5⅛ × 3⅞ in rectangle for the rail and a long 7⅞ × 3⅛ in strip for the bullets.
- Bullets: cut lines. Divide the long strip into five parts, 1⅝ in each — with four solid lines.
- Glue strips. Draw a line ⅝ in from the long edge on both pieces, as on the screen. The strip beyond it is for glue.
- Target and stand. Trace a circle 2 in across and a ¾ × 2 in strip.
- Stand: fold. Across the strip, ½ in from the end, draw the fold line as a dash-dot line.
- Target: rings. Draw four rings inside the circle, as on the screen. They don’t need to be neat.
- Color: target. Color every other ring red: the edge, the middle, and the bullseye.
Sheet 3
- Sheet 3: grip sheet. Remove the previous sheet and put the grip sheet in its place, lined up edge to edge. Don’t move the phone — the scale stays the same.
- Frame with grip: outline. Trace with a ruler: a long rectangle, two V-shaped notches on the right, and a tab with a slanted end on top.
- Frame with grip: folds. Don’t cut the fold lines: a dashed line is a mountain fold (away from you), a dash-dot line is a valley fold (toward you). Label the three long lines and the diagonal one with numbers, as on the screen.
Cut
- Cut out: barrel and plunger — 2 pcs. Cut out the square and the rectangle exactly along the lines, keeping the corners square.
- Cut out: rail and bullets — 2 pcs. Cut out the rail and the long strip. Don’t cut the strip into parts yet.
- Cut out: target and stand — 2 pcs. Cut out the circle and the stand strip.
- Cut out: frame with grip. Cut out the whole piece, tab included. On the right are two V-shaped notches: cut toward the point from both sides.
- Cut the strip into bullets. Cut the long strip along the four lines to get five 1⅝ × 3⅛ in slips — one for each bullet.
Roll
- Plunger and rail — on a pencil. Apply glue to the strip at the far edge. Starting from the near edge, roll the sheet tightly around the pencil — the pencil lies along the long side — press the seam and pull out the pencil. This is how you roll the plunger and the rail.
- Five bullets. Roll the five slips on the pencil the same way, with glue — with the short side along the pencil. The bullets will come out 1⅝ in long.
- Barrel — on two pencils. Put two pencils together and tape them near the ends. Without glue, roll the square tightly around them and secure the edge with three pieces of tape.
- Check the movement. Pull out the pencils and squeeze the barrel from the sides — it will become round. Insert the plunger, then a bullet: they should move freely, and the gap above the plunger is narrower than a pencil — 1/16–3/16 in.
- Cuts for the rubber band. At one end of the plunger and one end of the rail, make two cuts 3/16 in deep in each: cut from the end along the tube, with the second cut exactly opposite the first. The rubber band will sit in them.
Fold
- Grip sheet — in half. Flip the sheet so the lines face down and the tab points away from you. Fold it in half — the near edge to the far edge; the tab sticks out.
- In half again. Fold it once more the same way. You get a sturdy four-layer strip 1⅝ in wide: crease the folds and glue the layers together.
- Diagonal fold. Flip the strip with line 3 facing up: the tab is on the right, pointing away from you. Fold along the diagonal line toward you, crease it and apply glue under the fold: the grip now points down at an angle.
Assemble
- Rail to barrel. Place the rail against the side of the barrel: the end with the cuts overlaps the barrel by 2⅜ in, with the cuts facing up and down. Apply glue along the line where they touch and press them together.
- Frame and tab. Apply glue to the tab and lay the tubes on it: the rail along the edge of the frame, with the nose of the frame stopping ⅜ in short of the cuts. Wrap the tab around the barrel and rail: the slanted end will lie on the frame along its slanted edge.
- Plunger. Insert the plunger into the barrel from the back, cuts facing back. The cuts point up and down, like the rail’s.
- Rubber band. Fit the rubber band into the cuts on the rail. Pull both strands back — one over the gun, the other under it — and hook them into the cuts on the plunger. Cover both ends with a small piece of tape so the rubber band doesn’t slip off.
- Target on a stand. Fold the stand along the line. Glue its short part to the back of the target, a little above the middle, with the long part toward the edge — the target will rest on it.
Shoot
- Load the gun. Put a bullet into the muzzle and push it in until it reaches the plunger: the plunger slides back and the bullet sticks out 3/16–⅝ in. Set the target 8–12 in from the muzzle.
- Shot. Hold the gun by the grip, with the barrel level or tilted slightly up. Pull the plunger back by its tail 2 in and let go — it will knock the bullet out of the barrel.
Done. The gun is ready. Shoot only at the target — not at people or animals.
Make it with your phone camera
 Paper PlaneEasy
 Paper PopperEasy
 Paper HelicopterEasy
 Dart ShotgunHard
 Karambit and DaggerMedium
 ShurikenEasy