 VanGami.com
Shuriken
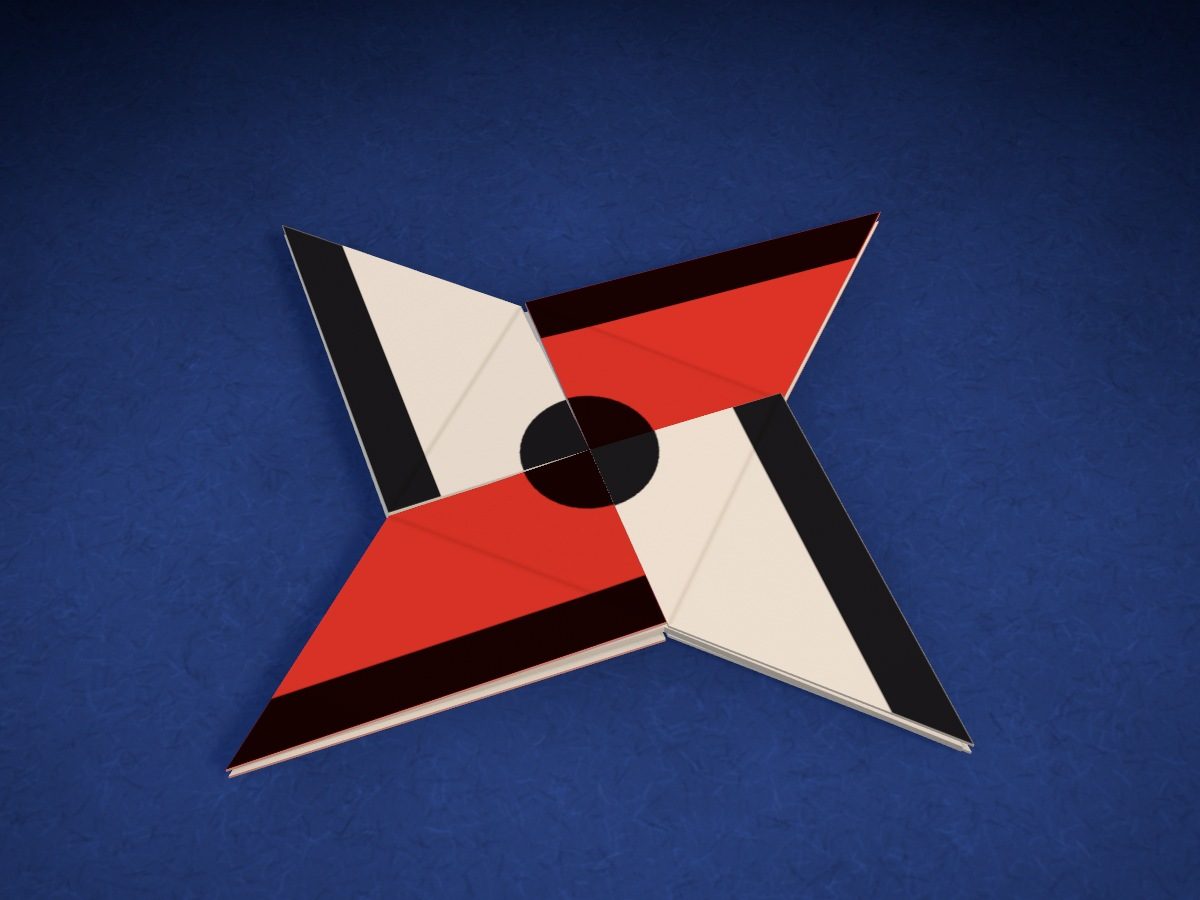
A classic shuriken made of two mirror-image modules: two colored sheets, only folds, no glue. The finished star is decorated through the camera — black blades and a circle in the middle.
- Easy
- 2 Letter sheets
- 2 modules
- 0 glue
Make it with your phone cameraLesson code: 1532
On VanGami the template appears over your sheet through your phone camera — no printer needed. Trace it, cut, fold and glue. Below are all the steps in text.
What you’ll need
- Letter sheet — office paper, 80 gsm (20 lb)
- Markers
- Pencil — and eraser
- Scissors — small
- Ruler — 8–12 in
- White Letter sheet — the same paper, 80 gsm (20 lb)
- Glass — phone stand
Steps
Blanks
- Color the sheet red. The paper is white, but you need a red sheet: color one sheet all over with a red marker on one side, moving the marker in one direction. The second sheet stays white.
- Fold the corner. Place the red sheet with its short side toward you. Fold the top right corner to the left edge, edge to edge, and crease the fold.
- Cut off the strip. Cut off the extra along the bottom edge of the triangle — you’ll get a 8½ × 8½ in square. You won’t need the narrow strip.
- Fold in half and cut. Unfold the square and fold it in half, edge to edge. Crease the fold, unfold it, and cut along it: two halves, 4¼ × 8½ in.
- Second sheet. Do the same with the white sheet. For the star you need one half of each color; set the other two aside — they’ll make a second star.
Fold
- Fold in half lengthwise. Fold both halves in half lengthwise, long edge to long edge, and crease the fold with your fingernail. You end up with two strips, each two layers thick.
- Center line. Fold each strip in half crosswise, short edge to short edge. Crease it and unfold it — that’s the center line.
- Corners. On the red strip, fold the bottom left corner up and the top right corner down: the short edge lies along the long edge. On the white strip, do the opposite: top left corner down, bottom right corner up.
- Ends to the center line. Fold the ends over the strip: on the red one, the left end down and the right end up, so the long edge lies along the center line. On the white one, the opposite: left end up, right end down.
Assemble
- Crisscross. Flip the red shape over with the triangles facing down. Lay the white one across it, triangles facing up: center on center.
- Red tips. Fold a red tip over onto the white shape and tuck its point into the pocket — under the edge of the white triangle. Do the same with the other red tip.
- White tips. Flip the star over. Fold the white tips the same way and tuck them under the red triangles — the star holds together without glue.
Trace
- Star under the camera. Place the star under the camera with the same side up as it had after assembly, and turn it until the arms lie on the outline. If the arms curve the other way, flip the star over. Don’t trace the outline: it’s the edge of the star.
- Blades and circle. Using a ruler, draw a line ¼ in from the long edge of each arm — that’s the edge of the black stripe. In the middle: a coin-sized circle, about ¾ in.
Color
- Black. Color the areas that match this color. Move the marker in one direction — you’ll get fewer streaks.
Throw
- Throw. Hold the star by one arm with two fingers and throw it with a wrist flick, flat — like a frisbee. Don’t throw it at people or animals.
Done. The shuriken is done. Fold a second one from the two spare halves the same way.
Make it with your phone camera
 Paper PlaneEasy
 Paper PopperEasy
 Paper GunMedium
 Paper HelicopterEasy
 Dart ShotgunHard
 Karambit and DaggerMedium