 VanGami.com
Oni Horns Headband
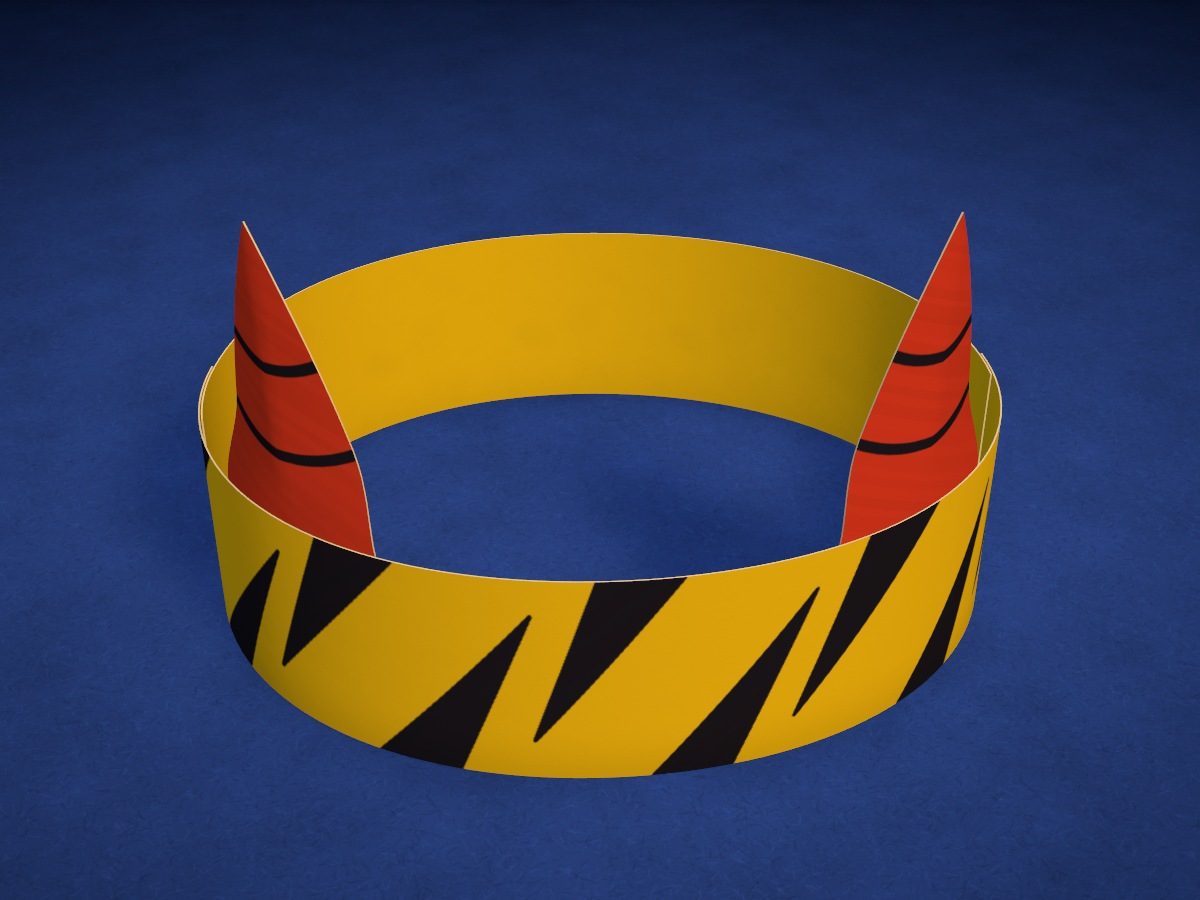
A paper headband for a little oni, sized to your own head: a yellow band with black tiger-stripe wedges and two red horns. The strips come from folding the sheet, and only the horns are traced through the camera; the band fits a head up to 20¾ in around, or up to 24½ in with an insert cut from the leftover sheet.
- Easy
- 1 Letter sheet
- 4 pieces
- 7 cm — horns
Make it with your phone cameraLesson code: 7460
On VanGami the template appears over your sheet through your phone camera — no printer needed. Trace it, cut, fold and glue. Below are all the steps in text.
What you’ll need
- Letter sheet — office paper, 80 gsm (20 lb)
- Markers
- Pencil — and eraser
- Scissors — small
- Glue stick — or PVA glue
- Tape — clear, wide
- Stapler — optional, instead of tape
- Glass — phone stand
Steps
Trace
- First horn: outline. Fold the sheet in half lengthwise, long edge to long edge, then unfold it. Trace the horn on one side of the fold, closer to the short edge of the sheet; the other half stays clean.
- First horn: drawing. Two arcs across the horn. The straight line at the bottom is the edge of the tab.
- Second horn: outline. Slide the sheet along the fold: the second horn goes on the same half, right below the first.
- Second horn: drawing. The same two arcs and the tab line.
Color
- Color: first horn. Color the horn red, from the tip down to the straight line, and the tab yellow. Go over the arcs in black on top.
- Color: second horn. Same way: red horn, yellow tab, black arcs.
Cut
- Cut out: first horn. Cut with scissors along the solid line: start from the nearest long edge of the sheet and don’t cut the clean half. Cut toward the pointed tip from both sides so the two cuts meet.
- Cut out: second horn. Same way, from the same edge of the sheet: don’t cut the clean half.
- Cut the sheet along the fold. Cut the sheet along the fold you already made. The clean half becomes the headband; keep the half with the holes — it’s a spare.
- Two strips. Fold the clean half in half lengthwise once more and cut along the fold. You get two strips, 2⅛ × 11 in — no ruler needed.
Glue
- Yellow strips. The strips are white but the band is yellow: color both strips all over with a yellow marker on one side. This is the front side — the wedges go on it.
- Tiger stripes. On one strip, draw nine slanted wedges with a black marker, taking turns from the top edge and the bottom edge. This is the front of the headband.
- Fold along the horn. Fold each horn in half lengthwise, with the drawing facing out, edge to edge, and open it only partway. With this crease the horn stands up and doesn’t flop over.
- Horns — onto the strip. Lay the strip with the wedges face down and apply glue to the horn’s tab on the drawing side. Press the horn onto the strip, also face down, 2 in from its end: the tab line runs along the edge; the second horn goes at the other end.
- One long band. Glue the second strip to the end of the first, overlapping by ⅜ in, on the same side as the horns’ tabs. That makes a band 21¾ in long.
Try on
- Fit it to your head. Wrap the band around your head with the horns at the front, the end of the back strip going under the front one. Pinch the seam with your fingers, take the headband off, and tape the seam on the outside and the inside.
Done. The headband is done. Put it on with the horns at the front — and that’s it.
Make it with your phone camera
 Cat MaskMedium
 Black Cat MaskMedium
 White Fox MaskMedium
 Oni Demon MaskMedium
 Origami ClawsEasy
 Fox Ears HeadbandEasy