 VanGami.com
Nail Polish Set
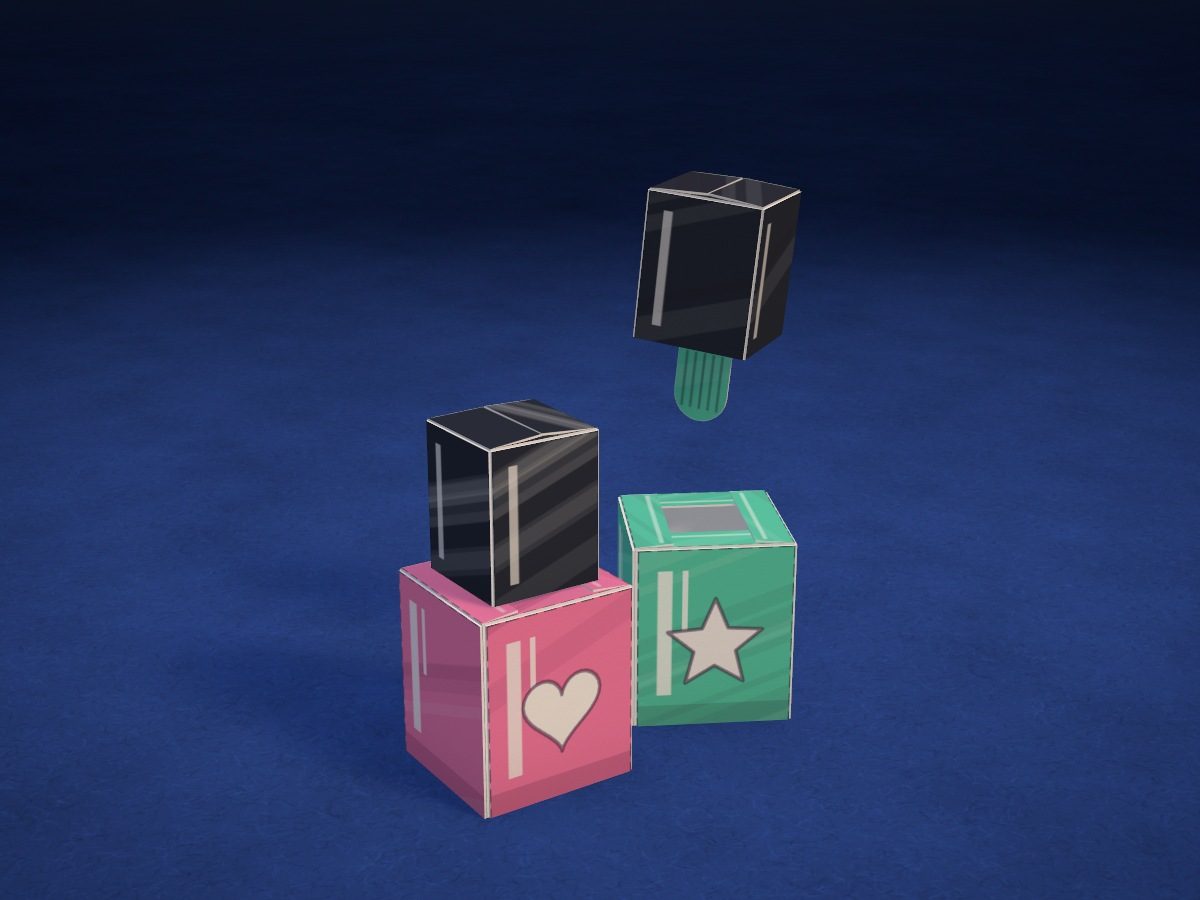
Two square little bottles — pink and mint — with black caps. Take off a cap: under it is a brush in the polish color, and in the neck of the bottle is a little window where the brush hides.
- Easy
- 2 bottles
- 2 caps with brushes
- 1 Letter sheet
Make it with your phone cameraLesson code: 6206
On VanGami the template appears over your sheet through your phone camera — no printer needed. Trace it, cut, fold and glue. Below are all the steps in text.
What you’ll need
- Letter sheet — office paper, 80 gsm (20 lb)
- Markers
- Pencil — and eraser
- Scissors — small
- Glue stick — or PVA glue
- Glass — phone stand
Steps
Trace
- Bottles: outlines. Trace two long strips with tabs along the top. Between the tabs are narrow wedges down to the dashed line — trace those too.
- Bottles: folds. Dashed lines are fold lines: three between the walls, one by the glue area on the left, and one under each tab.
- Bottles: drawing. On the first wall: a heart on the pink bottle and a star on the mint one. Highlights: two stripes on each wall.
- Caps: outlines. Trace two caps. Each has a long strip coming off a tab — that’s the brush. The second cap is upside down.
- Caps: folds. The folds of the cap are like the bottle’s. Plus one more — across the brush, right at the tab.
- Caps: brushes. The line across the brush marks the edge of the bristles: from it to the round tip, you’ll color them the bottle’s color.
Color
- Bottles: coloring. First bottle in pink, second in mint, tabs included. Leave the heart, star and highlight stripes white; don’t color the glue area.
- Caps: coloring. Walls and tabs in black; leave the narrow highlights white. Brush bristles in pink on the first cap and mint on the second; don’t color the brush handle or the glue area.
Cut
- Cut out: bottles — 2 pcs. Cut out both bottles. For the wedges between the tabs, make one straight cut from the top down to the dashed line, no farther.
- Cut out: caps — 2 pcs. Cut out the caps together with the brushes. For the wedges between the tabs, make one straight cut down to the dashed line. Color the brush bristles on the back too with the same marker: you can see them from both sides.
Bottles
- Roll up the bottles. Fold the strip along the dashed lines between the sides, with the drawing facing out. Put glue on the glue area at the left and glue it from the inside to the last side: you get a square tube. Do the same with the second bottle.
- Close the neck. Fold the front and back tabs inward. Put glue along the edges of the side tabs and lay them on top. A square window is left in the middle — the neck.
Caps
- Roll up the caps. Fold the cap along the dashed lines between the sides, with the drawing facing out, and glue the glue area from the inside to the last side. The brush sticks up for now. Do the same with the second cap.
- Close the caps. Fold the tab with the brush inward: the brush will hang in the middle of the cap. Fold the opposite tab too, then put glue on the other two and lay them on top.
Assemble
- Put on the caps. Lower the brush into the window and set the cap on the neck — either way around. Take it off: under the cap is a brush in the polish color.
Done. The polishes are done. Take off a cap — under it is a brush in the bottle’s color. You can use it to “paint” the paper nails from the “Press-On Nails” lesson.
Make it with your phone camera
 Paper MakeupMedium
 Magic CircleHard
 Paper PhoneEasy
 Dress-Up Doll: Gamer GirlMedium
 Dress-Up Doll: SwordsmanMedium
 Blind BagMedium