 VanGami.com
Magic Circle
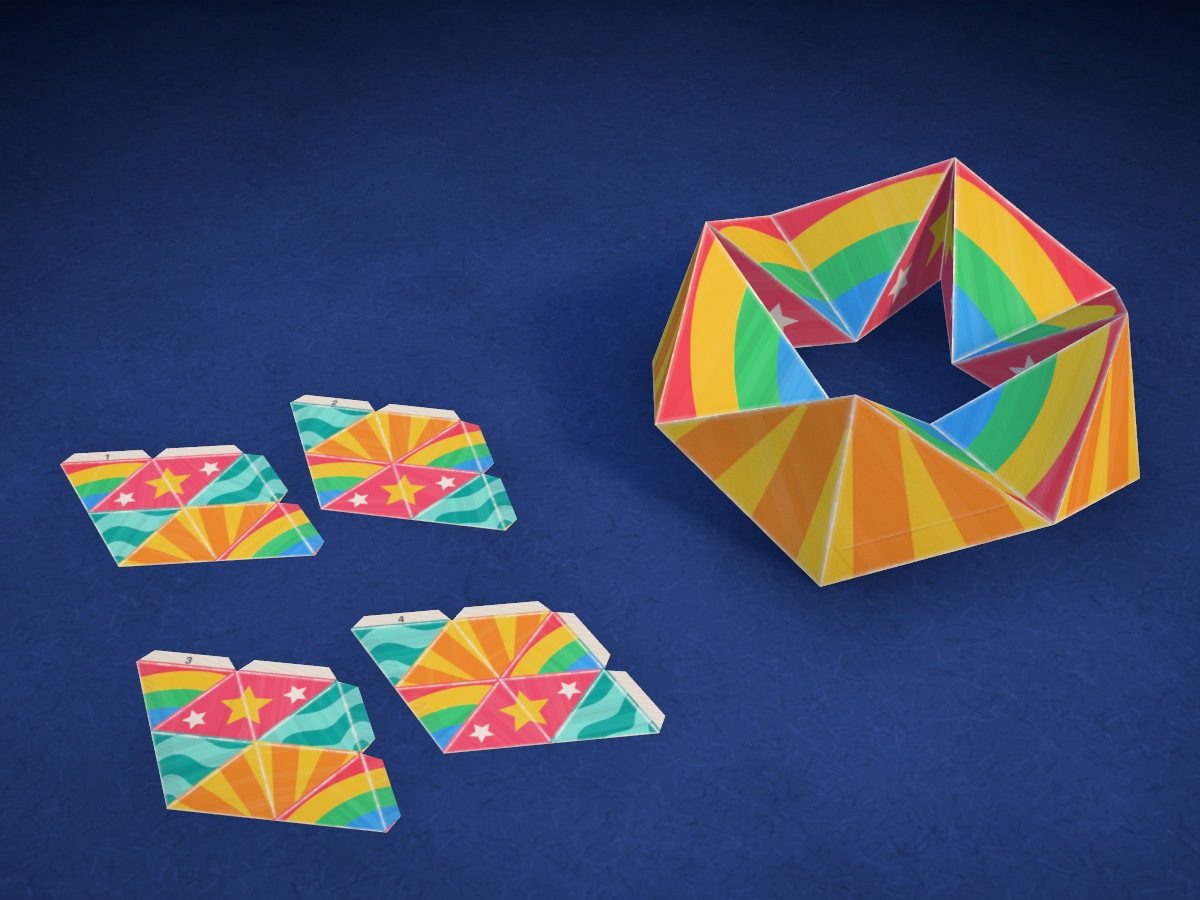
A ring of eight paper pyramids sharing folds. The pattern is four parts on one Letter sheet: you color them, glue them into a strip, and roll it up. The ring turns inside out through its middle endlessly, and the rainbow, sun, waves, and stars come up to the top one after another.
- Hard
- 8 pyramids
- 4 parts on a Letter sheet
- 4 designs
- 16 tabs
Make it with your phone cameraLesson code: 3943
On VanGami the template appears over your sheet through your phone camera — no printer needed. Trace it, cut, fold and glue. Below are all the steps in text.
What you’ll need
- Letter sheet — office paper, 80 gsm (20 lb)
- Markers
- Pencil — and eraser
- Empty pen — to score the folds
- Ruler — 8–12 in
- Scissors — small
- Glue stick
- Glass — phone stand
Steps
Trace
- Part 1: outline. Trace the solid line — the edge of the “Part 1” piece. You'll cut along it.
- Part 1: fold lines. Don't cut the fold lines. A dashed line is a mountain fold (away from you), a dash-dot line is a valley fold (toward you): draw them as they look on the screen.
- Part 1: drawing. Trace the color boundaries on all eight triangles, and write the number 1 on the top left tab.
- Part 2: outline. Trace the solid line — the edge of the “Part 2” piece. You'll cut along it.
- Part 2: fold lines. Don't cut the fold lines. A dashed line is a mountain fold (away from you), a dash-dot line is a valley fold (toward you): draw them as they look on the screen.
- Part 2: drawing. Trace the color boundaries on all eight triangles, and write the number 2 on the top left tab.
- Part 3: outline. Trace the solid line — the edge of the “Part 3” piece. You'll cut along it.
- Part 3: fold lines. Don't cut the fold lines. A dashed line is a mountain fold (away from you), a dash-dot line is a valley fold (toward you): draw them as they look on the screen.
- Part 3: drawing. Trace the color boundaries on all eight triangles, and write the number 3 on the top left tab.
- Part 4: outline. Trace the solid line — the edge of the “Part 4” piece. You'll cut along it.
- Part 4: fold lines. Don't cut the fold lines. A dashed line is a mountain fold (away from you), a dash-dot line is a valley fold (toward you): draw them as they look on the screen.
- Part 4: drawing. Trace the color boundaries on all eight triangles, and write the number 4 on the top left tab.
Color
- Color: part 1. Color to match the sample on the screen: light colors first, then dark. Leave the white stars white.
- Color: part 2. Color to match the sample on the screen: light colors first, then dark. Leave the white stars white.
- Color: part 3. Color to match the sample on the screen: light colors first, then dark. Leave the white stars white.
- Color: part 4. Color to match the sample on the screen: light colors first, then dark. Leave the white stars white.
Cut
- Cut out: part 1. Cut with scissors along the solid line. Turn the sheet, not the scissors — the cut will come out neater.
- Cut out: part 2. Cut with scissors along the solid line. Turn the sheet, not the scissors — the cut will come out neater.
- Cut out: part 3. Cut with scissors along the solid line. Turn the sheet, not the scissors — the cut will come out neater.
- Cut out: part 4. Cut with scissors along the solid line. Turn the sheet, not the scissors — the cut will come out neater.
Fold
- Score the lines. Lay out the parts drawing side up, in number order. Using a ruler, score all the fold lines with an empty pen: the slanted dashed lines and the vertical dash-dot lines where the ring turns inside out.
- Fold along the lines. Fold the diagonal dashed lines with the drawing on the outside, and the vertical dash-dot lines with the drawing on the inside and then the other way: the ring turns on these. Fold the top tabs back and open them up.
Glue
- Join the parts into a strip. Apply PVA glue to the two side tabs of part 1 and lay the left edge of part 2 on them: the edge on the dashed line, the corners at the ends of the tabs. Attach part 3 the same way, then 4.
- First pyramid. Apply glue to the top tab of the second column, roll the column into a pyramid, and press the tab from inside under the bottom edge. Don't glue the first column: it will stand open like a corner on its own.
- Six more pyramids. Roll columns three through eight the same way. You'll get a chain of seven pyramids on shared folds, and the first column stays an open corner.
Assemble
- Close the ring. Apply glue to the bottom side tab of part 4 and bend the chain into a ring. The tab goes into the open first column — press it from inside against the third triangle, along the edge.
- Close the first pyramid. Apply glue to the top side tab of part 4 and to the top tab of the first column. Close the first triangle: it lies over the side tab, and its tab goes under the bottom edge.
Check
- Turn the ring inside out. Hold the ring with both hands and rotate the pyramids through the middle. The rainbow, sun, waves, and stars come up to the top one by one.
Done. The magic circle is done. The folds loosen up over the first ten turns or so — after that the ring spins easily.
Make it with your phone camera
 Paper MakeupMedium
 Paper PhoneEasy
 Dress-Up Doll: Gamer GirlMedium
 Dress-Up Doll: SwordsmanMedium
 Blind BagMedium
 Finger PuppetsEasy