 VanGami.com
Mini Box with Lid
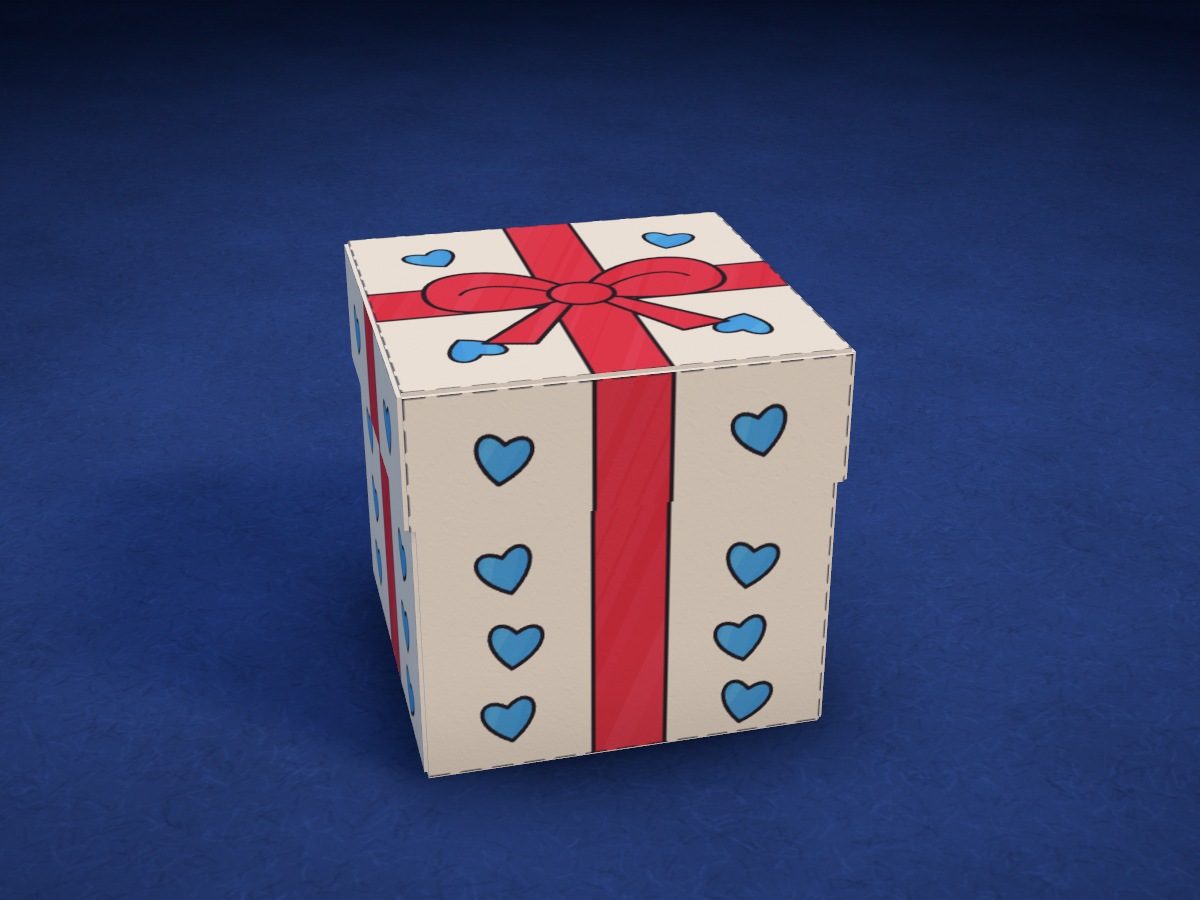
A 1¾ in cube with a real lid: the box is glued together from two L-shaped pieces, and the lid from a small cross shape. The white box with light blue hearts, the red ribbon and the bow are drawn with markers. Put a ring, a candy or a note inside.
- Easy
- 3 pieces
- 9 tabs
- 46 mm cube
Make it with your phone cameraLesson code: 3545
On VanGami the template appears over your sheet through your phone camera — no printer needed. Trace it, cut, fold and glue. Below are all the steps in text.
What you’ll need
- Letter sheet — office paper, 80 gsm (20 lb)
- Markers
- Pencil — and eraser
- Ruler — 8–12 in
- Empty pen — to score the folds
- Scissors — small
- Glue stick — or PVA glue
- Glass — phone stand
Steps
Trace
- Bottom: outline. Three squares in an L shape: the bottom and two walls, with a tab at the side of the upper wall. Put dots at all the corners using the screen, then connect them with a ruler.
- Bottom: folds. Two sides of the bottom and the line by the tab are dashed: you fold along them, not cut.
- Bottom: drawing. On each wall, draw a ribbon stripe in the middle and little hearts on the sides. Leave the square bottom blank.
- Walls: outline. Two squares side by side, with four tabs at the sides and the bottom. Dots at the corners, then lines with a ruler.
- Walls: folds. The line between the squares and the lines by the tabs are dashed.
- Walls: drawing. The same ribbon in the middle and little hearts on the sides as on the bottom.
- Lid: outline. The cross shape: a square a bit bigger than the bottom and four low rims, two of them with tabs. Dots at the corners, then lines with a ruler.
- Lid: folds. The sides of the square and the lines by the tabs are dashed.
- Lid: drawing. In the middle of the square, a bow on a cross of two ribbon stripes, with little hearts at the corners. On the rims, the same ribbon in the middle.
Color
- Color: bottom. Ribbon — red, hearts — light blue. Don’t color the tab: it goes inside.
- Color: walls. Ribbon — red, hearts — light blue. Leave the tabs white.
- Color: lid. The cross, bow and ribbons on the rims — red, hearts — light blue.
Cut
- Cut out: bottom. Cut out the bottom together with the tab. At the inside corner, cut exactly up to the line.
- Cut out: walls. Cut out the walls together with the four tabs.
- Cut out: lid. Cut out the lid together with the tabs. At the inside corners, cut exactly up to the line.
Fold
- Score and fold. Score all the dashed lines with an empty pen along a ruler — that way the folds come out neat. Turn the pieces face down, fold each line up and let go.
Glue
- Bottom and two walls. The bottom lies face down. Lift the wall with the tab, fold the tab inward and put glue on its outside. Lift the second wall and press it against the tab for 10 seconds.
- The other two walls. Fold the walls into an L, fold all four tabs inward and put glue on them. Set the L into the box: the bottom tabs go on the bottom, the side tabs against the walls on the inside. Press each tab with your finger.
- Lid. The lid lies face down. Lift the sides that have tabs, fold the tabs inward and put glue on them. Press the other two sides against them.
Assemble
- Put on the lid. Put a gift inside. Turn the lid bow side up and slide it on from the top — it’s a little bigger than the box and slides all the way down.
Done. The box is done. Put a small gift inside — the lid stays on by itself.
Make it with your phone camera
 Gift BoxEasy
 Candy BoxMedium
 Cake BoxMedium
 Gift BagMedium
 Cake Slice BoxEasy
 Candy Corn BoxMedium