 VanGami.com
Candy Box
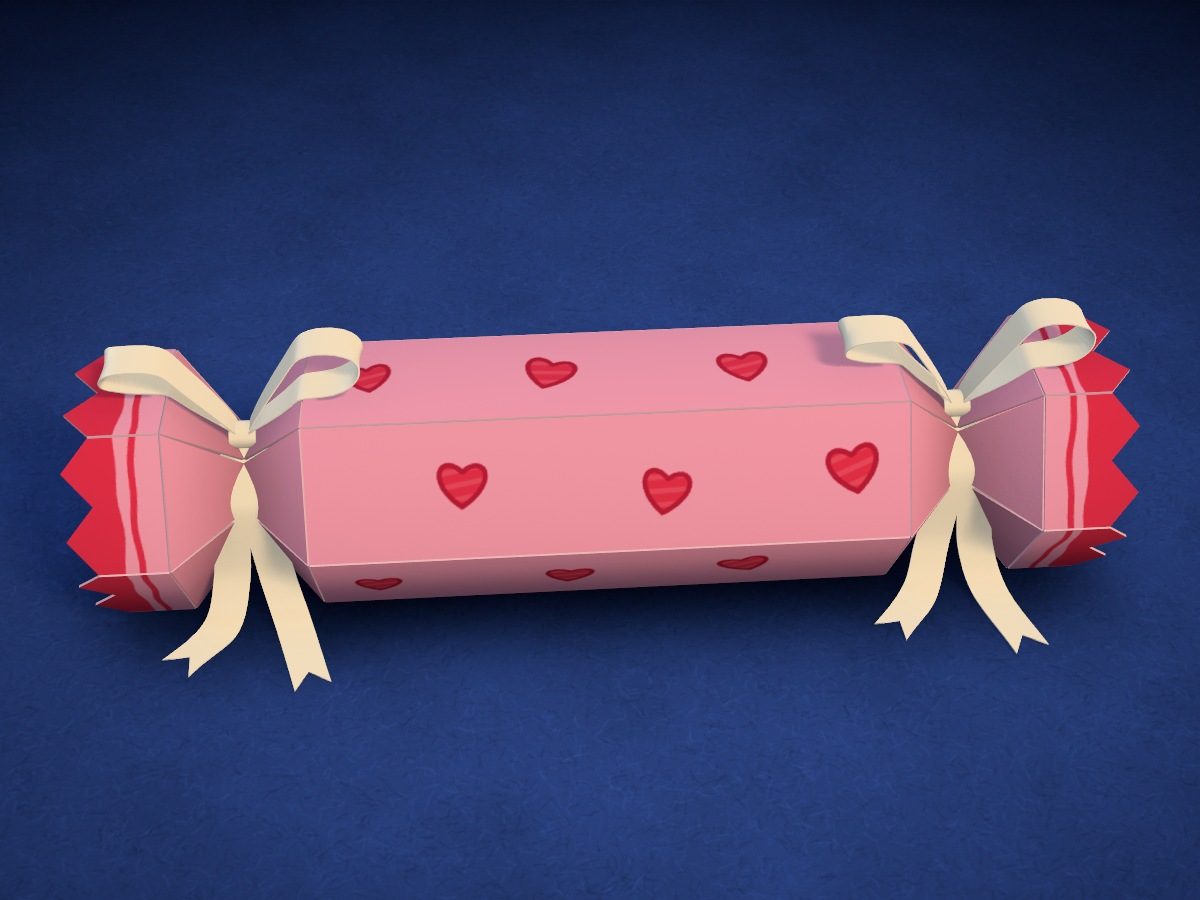
One candy box from a single Letter sheet: the net with hearts is rolled into a six-sided tube, and the ends are tied off with ribbon. A candy bar or a note fits inside.
- Medium
- 1 Letter sheet
- 10 diamond slits
- 2 bows
Make it with your phone cameraLesson code: 8744
On VanGami the template appears over your sheet through your phone camera — no printer needed. Trace it, cut, fold and glue. Below are all the steps in text.
What you’ll need
- Letter sheet — office paper, 80 gsm (20 lb)
- Markers
- Pencil — and eraser
- Ruler — 8–12 in
- Scissors — small
- Glue stick — or PVA glue
- Empty pen — to score the folds
- Thread or string
- Treat — a candy bar up to 3⅞ in, candies, or a note
- Glass — phone stand
Steps
Trace
- Outline. Trace the edge of the net with a solid line: the teeth along the top and bottom, the three tabs on the right, and two triangular notches on each side. You’ll cut along this line.
- Diamonds. Ten diamonds — five along each toothed edge — also with a solid line. You’ll cut them out later, along the fold.
- Fold. Folds aren’t cut: draw them as a dashed line along a ruler, thin and light, without pressing hard — six long ones from top to bottom, straight through the diamonds, and four crosswise ones at their tips. On the bridges between the diamonds, draw dash-dot marks: those folds go toward you.
- Little hearts. Copy the little hearts with thin lines: three per row, staggered like a checkerboard — they don’t need to be exact. Along the toothed edges: a stripe and a thin line.
Color
- Pink. The paper is white, but these parts should be this color: color them in completely, up to the outline. Move the marker in one direction.
- Color the design. Color the hearts, the teeth and the stripes along them with a red marker — right over the pink.
Cut
- Cut out: net. Cut out the net along the outer line: the teeth, the three tabs on the right, and the notches on the sides. Leave the diamonds alone for now.
Fold
- Score the lines. Score all the fold lines with an empty pen along a ruler: six long ones and six crosswise ones — four at the tips of the diamonds and two along the dash-dot marks on the bridges. Paper folds neatly along a scored line.
- Fold and two diamonds. Fold the sheet along the third long line from the left — it runs through the middle diamonds — design side out, and crease it. Without unfolding it, cut two triangles at the fold along the lines: when you open it up, they’ll be diamonds.
- Four more lines. Fold the sheet the same way along the other four lines with diamonds and cut off the triangles: you’ll get ten diamonds, five along each edge. Fold the three tabs on the right along their line, in the same direction.
- Fold crosswise. Along the four lines at the tips of the diamonds, fold the edge away from you; along the dash-dot marks on the bridges, fold it toward you, opening the sheet flat again each time. The candy’s ends will form here.
- Erase the pencil. The folds are marked — erase the pencil that was left uncolored with an eraser. The lines under the marker won’t erase, so don’t rub them. It’s easier on the flat sheet than on the finished tube.
Glue
- Glue on the tabs. Lay the sheet design side up and apply glue to the three tabs on the right: one long and two short.
- Roll the hexagon. Roll the sheet along the long folds with the design facing out and tuck the tabs under the opposite edge. Press the seam and hold for half a minute — you’ll get a six-sided tube.
Assemble
- First end. Turn the tube seam side down, wrap the ribbon around the middle of the diamonds, where the bridges are folded, and pull it tight — the bridges will fold inward. Tie a bow.
- Treat inside. Through the open end, put a candy bar, candies, or a note into the box.
- Second end. Pull the other end tight with ribbon the same way and tie a bow.
Check
- Fluff out the tails. Fluff out the zigzag tails and the bow loops — the candy is done. To open the box, untie one bow.
Done. The candy box is done. To get the treat out, untie one bow.
Make it with your phone camera
 Gift BoxEasy
 Cake BoxMedium
 Gift BagMedium
 Cake Slice BoxEasy
 Candy Corn BoxMedium
 Little Gift Box with a BowEasy