 VanGami.com
Mascara
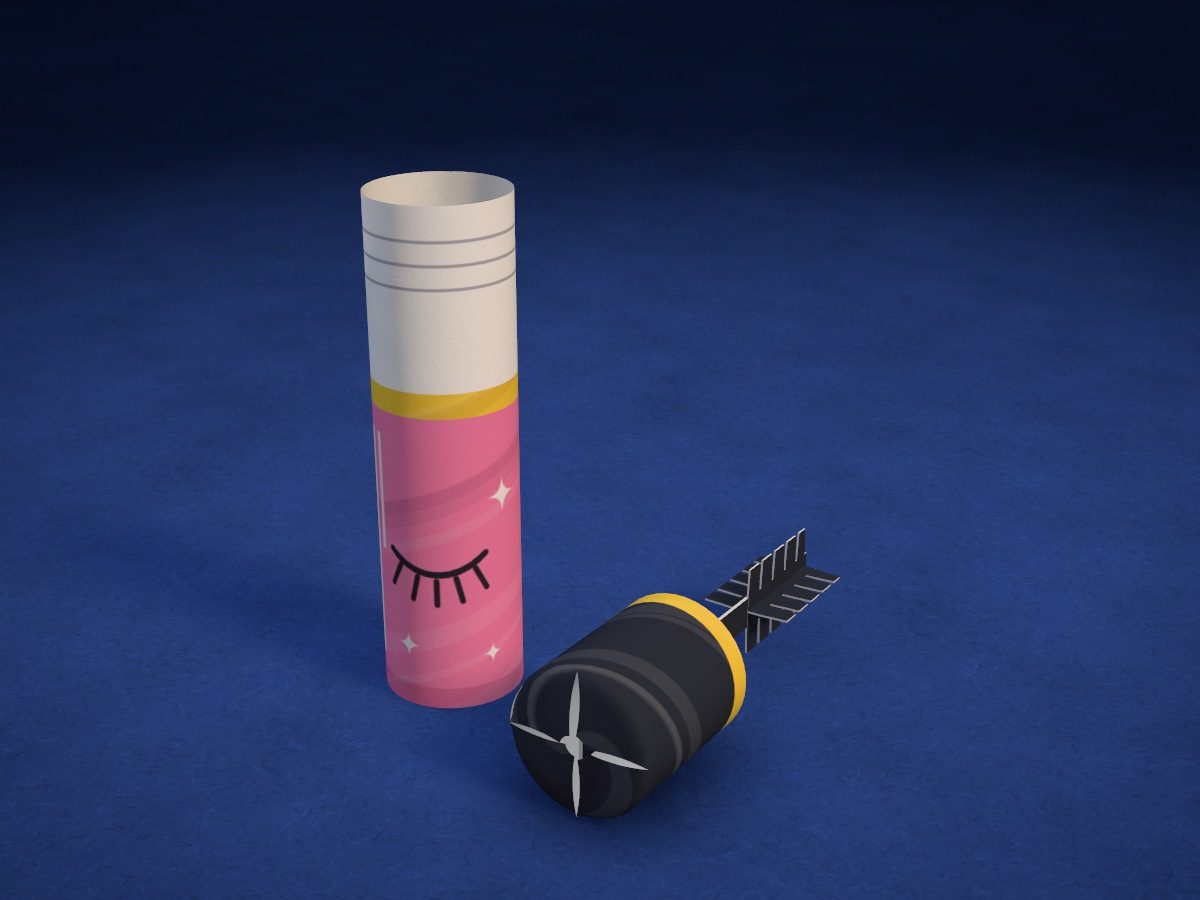
A pink tube with a closed eye and lashes, a black cap with a gold rim. Take off the cap and out of the tube comes a wand with a fluffy fringe brush.
- Medium
- 2 tubes
- 1 brush
- 1 Letter sheet
Make it with your phone cameraLesson code: 4849
On VanGami the template appears over your sheet through your phone camera — no printer needed. Trace it, cut, fold and glue. Below are all the steps in text.
What you’ll need
- Letter sheet — office paper, 80 gsm (20 lb)
- Markers
- Pencil — and eraser
- Scissors — small
- Glue stick — or PVA glue
- Glass — phone stand
Steps
Trace
- Tube: outline. Trace the big rectangle — that’s the mascara tube.
- Tube: drawing. On the left is the line of the glue area; across it is the edge of the neck. Below: a closed eye with lashes, and sparkles.
- Cap and brush: outlines. Trace three pieces: the long wand on the left, the cap with flaps, and the brush under it.
- Cap and brush: cut lines. The short cut at the top of the wand and the fringe on the brush — you cut along these.
- Cap and brush: folds. Dashed lines: along the wand and across its top, at the base of the cap’s flaps, and across the brush.
- Cap and brush: layout marks. On the cap: the line of the glue area and the rim at the bottom. On the brush: the spot for the wand.
Color
- Tube: coloring. Below the neck in pink, the narrow rim under it in yellow. Eye and lashes in black; leave the highlight and sparkles white; don’t color the neck or the glue area.
- Cap and brush: coloring. Cap, the wand below the tabs, and the whole brush in black; the cap’s rim in yellow, leave the highlight white.
Cut
- Cut out: tube. Cut with scissors along the solid line. Turn the sheet, not the scissors — the cut will come out neater.
- Cut out: cap and brush — 3 pcs. Cut out the wand, the cap and the brush along the outline and snip the top of the wand down to the fold. Don’t cut the fringe yet: it’s cut once the brush is on the wand.
Roll
- Roll the tube. Spread glue on the margin on the left, up to the line, and roll the strip with the pink side out: the right edge goes onto the line. You get a tube.
- Cap. Wrap the cap around the neck of the tube, flaps up, and glue the glue area to the cap itself. Slide it off and fold the flaps inward one at a time, each new one on glue over the one before.
Brush
- Fold the wand. Put glue on the back of the wand below the crosswise fold and fold it in half lengthwise, black side out. Bend the two halves above the fold apart in opposite directions to make a T.
- Put on the brush. Put glue on the brush and fold it in half over the end of the wand: the wand is in the middle with ¼ in of fringe on each side. When the glue sets, cut the fringe along the four lines on each side through both layers at once.
- Wand into the cap. Put glue on top of the little tabs, push the wand into the cap from below, and press the tabs against the top of the cap from inside with the tip of a pencil. When the glue sets, lower the brush into the tube and put the cap on all the way.
Done. The mascara is done. Take off the cap and pull out the brush; bend every other bristle forward and back — the brush will look fluffy.
Make it with your phone camera
 Paper MakeupMedium
 Magic CircleHard
 Paper PhoneEasy
 Dress-Up Doll: Gamer GirlMedium
 Dress-Up Doll: SwordsmanMedium
 Blind BagMedium