 VanGami.com
Buzz Spinner
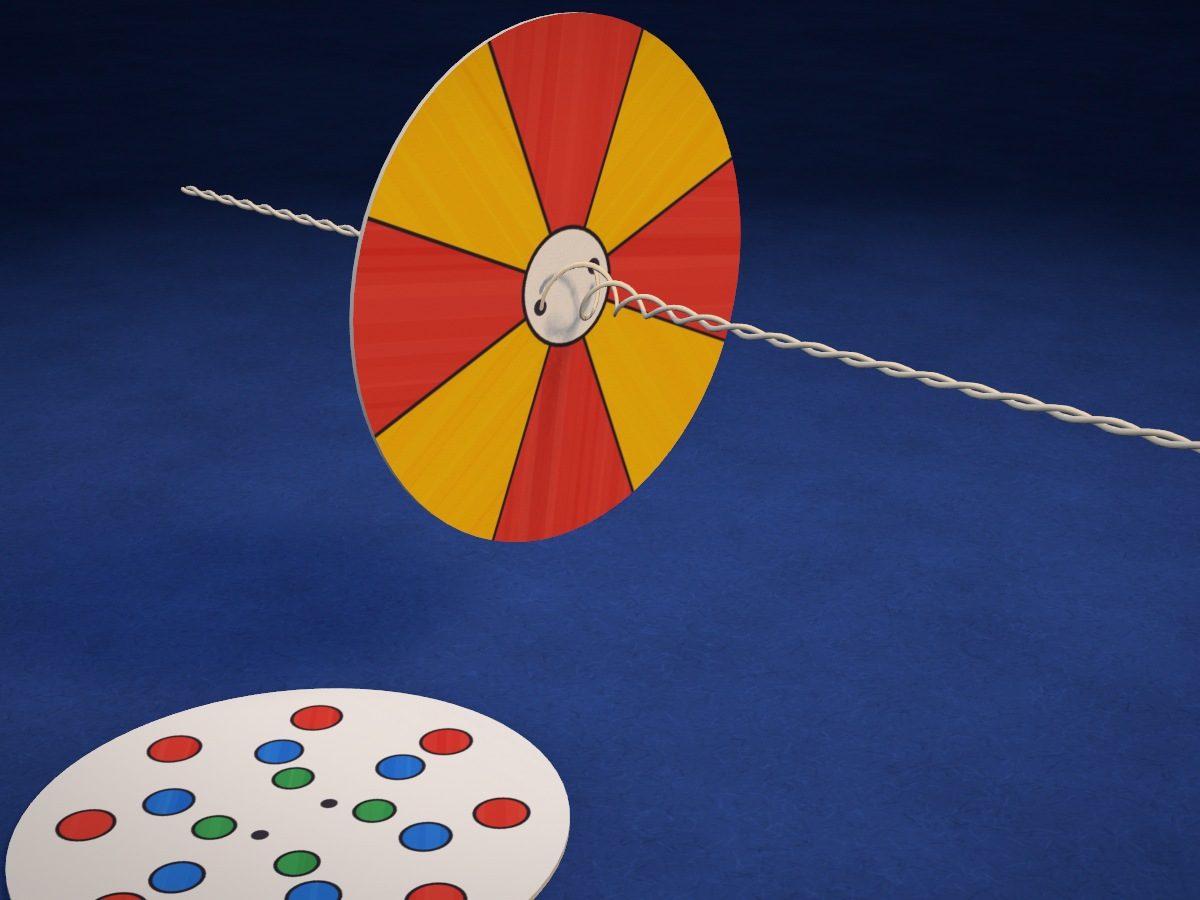
Two paper circles glued back to back and threaded on a loop of thread. Wind up the thread and pull — the circle buzzes and spins so fast that the sections blend into one color and the colored dots turn into rings.
- Easy
- 2 circles, 3⅛ in each
- 1 thread, 31½–39½ in
- 1 Letter sheet
Make it with your phone cameraLesson code: 2628
On VanGami the template appears over your sheet through your phone camera — no printer needed. Trace it, cut, fold and glue. Below are all the steps in text.
What you’ll need
- 2 Letter sheets — office paper, 80 gsm (20 lb)
- Markers
- Pencil — and eraser
- Scissors — small
- Glue stick — or PVA glue
- Thread or string
- Glass — phone stand
Steps
Trace
- Sturdy sheet from two. Apply glue stick over the whole surface of a sheet of printer paper, press a second sheet onto it, and smooth with your palm from the middle to the edges. You'll get a thick sheet — work on that one. Put it back in the same spot, edge to edge; don't move the phone.
- “Fire” circle: outline. Trace the circle with a solid line. You’ll cut along it.
- “Fire” circle: drawing. Draw the sector lines with a ruler through the middle and the small circle in the center. The two small circles near the middle are the spots for the holes.
- “Rings” circle: outline. Trace the second circle with a solid line.
- “Rings” circle: drawing. Trace the dots: eight along the edge, six closer to the middle and four right at the center.
Color
- Color the “fire” circle. Color the sectors red and yellow, alternating; leave the circle in the middle white.
- Color the “rings” circle. Dots along the edge in red, the middle ones in blue, the ones by the center in green. Leave the background white.
Cut
- Cut out: “fire” circle. Cut with scissors along the solid line. Turn the sheet, not the scissors — the cut will come out neater.
- Cut out: “rings” circle. Cut with scissors along the solid line. Turn the sheet, not the scissors — the cut will come out neater.
Glue
- Glue the circles together. Turn the “rings” circle drawing side down and spread glue over the whole blank side. Put the “fire” circle on top, drawing side up, with the edges lined up. Press and smooth it out.
Thread
- Two holes. Put an eraser under the center and poke through both marks with a sharp pencil. Twist the pencil to make the holes a little wider — as thick as the thread.
- Thread it through. Thread it through one hole and back through the other, then tie the ends in a knot. Slide the circle to the middle: there should be a loop of the same length on each side.
Spin
- Wind it up. Hook the loops over the fingers of both hands, with the circle in the middle. Swing the circle around like a jump rope 20–30 times — the thread twists into a cord.
- Pull — and the picture changes. Pull your hands apart sharply, ease off a little, pull apart again — in a rhythm. The circle buzzes, the sections blend into orange, and the dots into rings.
Done. The spinner is done. The tighter you wind the thread, the longer and louder it buzzes. Watch how the picture changes — and try drawing your own circle.
Make it with your phone camera
 Paper MakeupMedium
 Magic CircleHard
 Paper PhoneEasy
 Dress-Up Doll: Gamer GirlMedium
 Dress-Up Doll: SwordsmanMedium
 Blind BagMedium