 VanGami.com
Pumpkin
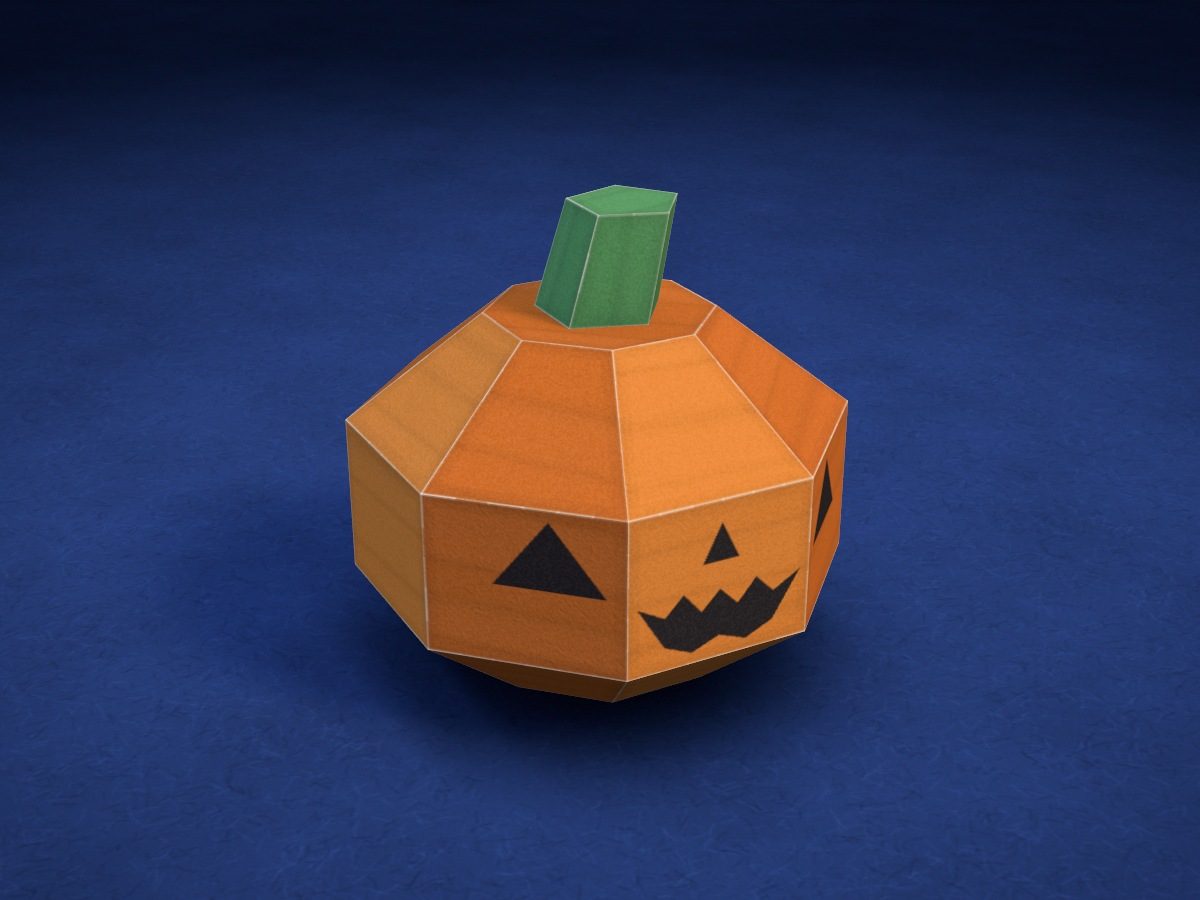
A faceted pumpkin with a little stem — for Halloween. Two pieces, 33 faces. Draw its face with a black marker.
- Medium
- 33 faces
- 40 tabs
- 1 Letter sheet
Make it with your phone cameraLesson code: 8620
On VanGami the template appears over your sheet through your phone camera — no printer needed. Trace it, cut, fold and glue. Below are all the steps in text.
What you’ll need
- Letter sheet — office paper, 80 gsm (20 lb)
- Markers
- Pencil — and eraser
- Ruler — 8–12 in
- Scissors — small
- Glue stick — or PVA glue
- Empty pen — to score the folds
- Glass — phone stand
Steps
Trace
- Pumpkin: outline. Trace the solid line along the edge of “Pumpkin” — tabs included. You’ll cut along it.
- Pumpkin: folds. All the lines inside are dashed: these are folds, so don’t cut them.
- Pumpkin: numbers. Copy the numbers: the tab and the edge it tucks under have the same number. On the faces, write them faintly, right at the edge — these numbers end up on the outside; erase them with an eraser after gluing. A letter marks the spot where pieces are glued to each other. Trace the picture here too.
- Stem: outline. Trace the solid line along the edge of “Stem” — tabs included. You’ll cut along it.
- Stem: folds. All the lines inside are dashed: these are folds, so don’t cut them.
- Stem: numbers. Copy the numbers: the tab and the edge it tucks under have the same number. On the faces, write them faintly, right at the edge — these numbers end up on the outside; erase them with an eraser after gluing. A letter marks the spot where pieces are glued to each other.
Color
- Dark orange. Color the faces of this color. Don’t color the tabs — glue sticks better to bare paper.
- Orange. Now the faces of this color. Move the marker in one direction — you’ll get fewer streaks.
- Green. Now the faces of this color. Move the marker in one direction — you’ll get fewer streaks.
- Black. Use black for the drawing. Don’t color the tabs.
Cut
- Cut out: pumpkin. Cut with scissors along the solid line, tabs included. In the narrow spots between the tabs, cut with the tips of the scissors.
- Cut out: stem. Cut with scissors along the solid line, tabs included. In the narrow spots between the tabs, cut with the tips of the scissors.
Fold
- Fold: pumpkin. First score the dashed lines with an empty pen along a ruler. Then fold every line away from you — design facing out — and the tabs too.
- Fold: stem. First score the dashed lines with an empty pen along a ruler. Then fold every line away from you — design facing out — and the tabs too.
Glue
- Pumpkin: tabs 1–5. Apply glue to tabs 1 through 5 and glue each one under the edge with the same number. Press for 10 seconds. The piece will start closing into a 3D shape on its own.
- Pumpkin: tabs 6–10. Apply glue to tabs 6 through 10 and glue each one under the edge with the same number. Press for 10 seconds.
- Pumpkin: tabs 11–15. Apply glue to tabs 11 through 15 and glue each one under the edge with the same number. Press for 10 seconds.
- Pumpkin: tabs 16–20. Apply glue to tabs 16 through 20 and glue each one under the edge with the same number. Press for 10 seconds.
- Pumpkin: tabs 21–25. Apply glue to tabs 21 through 25 and glue each one under the edge with the same number. Press for 10 seconds.
- Pumpkin: tabs 26–31. Apply glue to tabs 26 through 31 and glue each one under the edge with the same number. Press for 10 seconds. This is the lid: its tabs are glued all at once — apply glue to all of them, tuck them inside, and press the lid all the way around with your finger.
- Stem: tabs 1–3. Apply glue to tabs 1 through 3 and glue each one under the edge with the same number. Press for 10 seconds. The piece will start closing into a 3D shape on its own.
- Stem: tabs 4–6. Apply glue to tabs 4 through 6 and glue each one under the edge with the same number. Press for 10 seconds.
- Stem: tabs 7–9. Apply glue to tabs 7 through 9 and glue each one under the edge with the same number. Press for 10 seconds. Press the last tab from the outside with a finger or a pencil.
Assemble
- Stem — into place. Apply glue to the face marked A and glue the “Stem” piece to the same letter on the “Pumpkin” piece. The faces are different sizes: center the smaller one exactly on the larger one.
Done. The figure is done. Let the glue dry for 10 minutes — then you can put it on a shelf.
Make it with your phone camera
 GhostMedium
 Star PiñataHard
 Cobweb with a SpiderEasy
 Paper Chain GarlandEasy
 La CatrinaHard
 Halloween SuncatchersMedium