 VanGami.com
Halloween Suncatchers
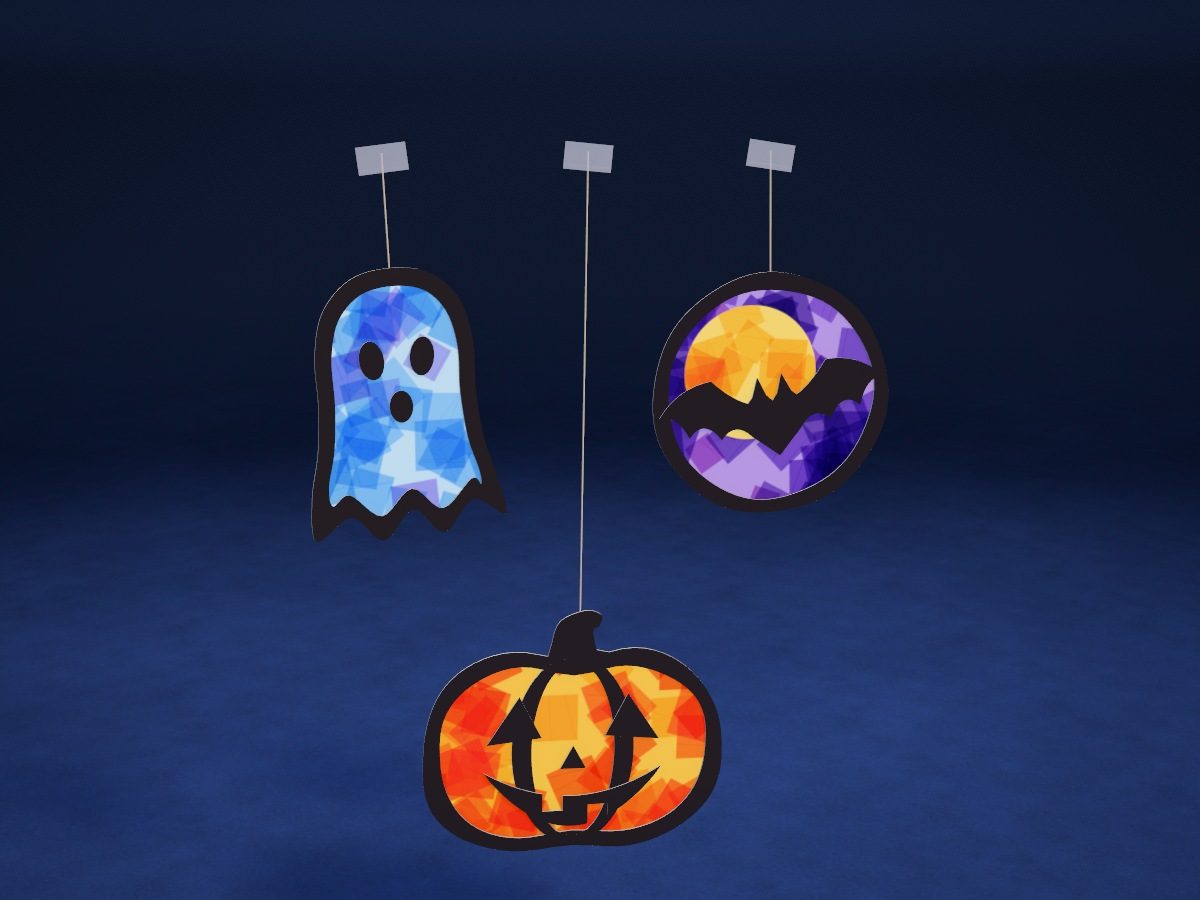
Three suncatchers for a window: a pumpkin, a ghost, and a bat against the moon. The frames are cut from black paper, and the openings are filled with pieces of colored tracing paper sandwiched between two layers of clear self-adhesive film. Held up to the light, the tracing paper glows like colored glass.
- Medium
- 3 suncatchers
- 11 black pieces
- 4 tracing paper colors
Make it with your phone cameraLesson code: 1071
On VanGami the template appears over your sheet through your phone camera — no printer needed. Trace it, cut, fold and glue. Below are all the steps in text.
What you’ll need
- Letter sheet — office paper, 80 gsm (20 lb)
- Markers
- Pencil — and eraser
- Scissors — small
- Tape — clear, wide
- Ruler — 8–12 in
- Clear self-adhesive film — for covering textbooks, a 17¾ × 11¾ in piece
- Colored tracing paper or tissue paper — orange, yellow, light blue, purple — a quarter of a Letter sheet each
- Sheet of white paper — base sheet: colors show up on it
- Lid or shot glass — about 2 in across: for tracing the moon circle
- Threads — three, 11¾ in each
- Glass — phone stand
Steps
Trace
- Pumpkin: outline. Trace the pumpkin with its stem and the three windows; the strips between them are the ribs, and they stay. The template is a view from the back: the finished stained glass will come out mirrored, as in the first picture.
- Pumpkin face: outlines. Two triangle eyes, a nose, and a smile with two teeth — four separate pieces.
- Ghost: outline. An outer line with a wavy hem and the same line inside it, 3/16–¼ in from the edge. The frame is the space between them.
- Ghost face: outlines. Three ovals: two eyes and a mouth.
- Moon: outline. Two circles: an outer one and a window inside it. That leaves a ring 3/16–¼ in wide.
- Bat: outline. Trace the whole silhouette: ears, wings with points, and a little tail.
Color
- Black. The paper is white, but these parts should be this color on both sides: color them up to the outline, then turn the sheet over and color the back.
Cut
- Cut out: pumpkin frame. Cut the pumpkin out along the outer line. Cut the three windows with a craft knife on cardboard: the ribs between them are narrow, so run the knife from the rib toward the frame.
- Cut out: pumpkin face — 4 pcs. Cut out the eyes, nose, and smile. For the tooth notches, make two short cuts toward the corner.
- Cut out: ghost frame. Cut the ghost out along the outer line. Cut the window with a knife or nail scissors, starting from a hole pierced in the middle; don’t make the frame narrower: it’s only 3/16–¼ in.
- Cut out: ghost face — 3 pcs. Cut out the three ovals — it’s easier with nail scissors, turning the paper as you go.
- Cut out: moon ring. Cut out the circle, then the window inside it: that leaves a ring 3/16–¼ in wide.
- Cut out: bat. Cut out the bat. Cut the wing points with short cuts from the edge toward the corner, turning the paper.
- Cut the tracing paper. Cut the tracing paper of each color into strips ⅝–¾ in wide, then cut the strips into little squares; they don’t need to be neat. From the yellow one, also cut a circle ⌀ 2 in — that’s the moon: trace a lid or a shot glass.
Pumpkin
- Film, sticky side up. Cut two pieces from the film, 5⅞ × 5⅛ in each. Peel the backing off one and lay it on the white sheet sticky side up.
- Frame onto the film. Lay the pumpkin frame on the film with the pencil lines facing up and press it down all along the outline — ribs and stem included.
- Pumpkin face. Lay the eyes, nose, and smile on the film inside the frame: the eyes go over the ribs, the nose between them, the smile below. The film grabs on contact, so test the fit in the air first.
- Tracing paper. Cover the windows with pieces of tracing paper: first scatter the yellow ones around, then add the orange ones, overlapping, until no sticky spots are left in the windows. Where there are two layers, the color is deeper.
- Second layer of film. Peel the backing off the second piece and cover the suncatcher sticky side down: lay down one edge and smooth with your palm toward the other, pushing the air out.
- Trim and flip. Trim the film around the frame, leaving a 1/16–⅛ in margin: the film layers will stick together and seal the edge. Flip it over — that’s the front.
Ghost
- Frame and face. Same as before: two pieces of film, 4⅛ × 5⅛ in. One goes sticky side up; lay the ghost frame on it, and inside the frame, two eyes and a mouth.
- Tracing paper. Cover the window with light blue pieces, overlapping, and add five or six purple ones on top: held up to the light, they’ll make darker patches.
- Cover and trim. Cover with the second piece of film, smooth it out, and trim leaving a 1/16–⅛ in margin — follow the wavy hem in a smooth line. Flip it face up.
Moon
- Ring and bat. Two pieces of film, 4¾ × 4¾ in, one of them sticky side up. Lay the ring on it and the bat across the ring: the wing tips rest on the ring.
- Moon and sky. Lay the yellow circle right on top of the bat — above and to the right of the middle of the window, ⅛ in from the ring; the top is where the bat’s ears are. Cover the rest with purple pieces: around the circle, overlapping its edge slightly.
- Cover and trim. Cover with the second piece of film, smooth it out, and trim around in a circle leaving a 1/16–⅛ in margin. Flip it over: the bat is flying across the moon.
Hang
- Threads. Tape a 11¾ in thread to each suncatcher — with a piece of tape on the back, near the top edge of the frame. On the pumpkin, attach it to the stem.
Check
- Toward the light. Tape the free ends of the threads to the window frame — or hang the suncatchers in front of a lamp. Held up to the light, the tracing paper glows, and double layers look darker.
Done. The suncatchers are done. They look brightest in a window during the day — or in front of a lamp in the evening.
Make it with your phone camera
 PumpkinMedium
 GhostMedium
 Star PiñataHard
 Cobweb with a SpiderEasy
 Paper Chain GarlandEasy
 La CatrinaHard