 VanGami.com
Honeycomb Ball
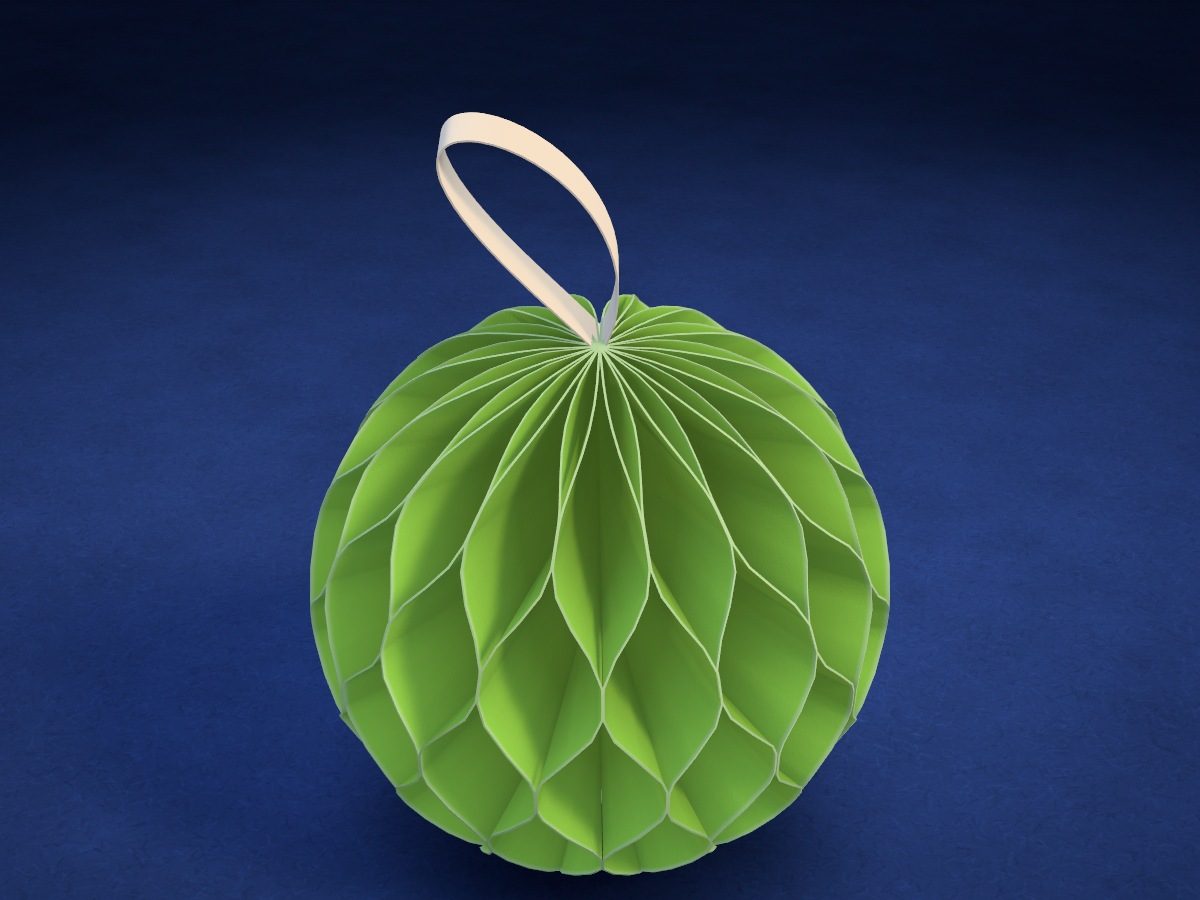
Thirty-two semicircles of office paper are glued together with strips on every other one: the flat stack opens into a ball with diamond-shaped cells and hangs from a ribbon.
- Medium
- 32 semicircles
- 4 Letter sheets for the half-circles
- 5 glue lines on the guide sheet
- 10 cm in diameter
Make it with your phone cameraLesson code: 6181
On VanGami the template appears over your sheet through your phone camera — no printer needed. Trace it, cut, fold and glue. Below are all the steps in text.
What you’ll need
- Letter sheet — office paper, 80 gsm (20 lb)
- Pencil — and eraser
- Scissors — small
- Glue stick
- Ruler — 8–12 in
- 4 more Letter sheets — printer paper, 80 gsm (20 lb): half-circles are cut from it, so the ball comes out white
- Thread or string
- Thick book — to press the stack
- Glass — phone stand
Steps
Trace
- Stencil: outline. Trace the half-circle — you'll use it to trace all 32 half-circles, so cut carefully.
- Guide sheet: outline. Trace the solid line — the edge of the “Guide sheet” piece. You'll cut along it.
- Marks. Trace the arc, the straight line under it and five lines across — use a ruler. On three of the lines draw circles at the top and bottom, as shown on the screen.
Cut
- Cut out: stencil. Cut with scissors along the solid line. Turn the sheet, not the scissors — the cut will come out neater.
- Cut out: guide sheet. Cut with scissors along the solid line. Turn the sheet, not the scissors — the cut will come out neater.
- Fold the sheet. Fold a sheet of printer paper in half crosswise: short edge to short edge. Crease the fold.
- Trace the stencil 4 times. Place the stencil on the folded sheet and trace it with a pencil 4 times — right next to each other, but not overlapping.
- Cut out the semicircles. Cut through both layers at once — each sheet gives 8 semicircles. Do the same with three more sheets: 32 semicircles in total.
Glue
- Two stacks. Put the guide sheet on the table and the semicircles in two stacks of 16 on either side of it. From the left stack, glue goes on the lines with circles; from the right stack, on the lines without circles.
- First semicircle. Take a semicircle from the left stack and place it on the guide sheet: the straight edge along the straight line, the curve along the arc. The ends of the lines stick out above and below the semicircle.
- Glue on the lines with circles. Draw a narrow strip of glue stick along each line with circles — from the straight edge to the arc. That makes three strips.
- Second semicircle. Take a semicircle from the right stack and place it exactly on top of the first, edge to edge. Press down with your palm.
- Glue on the lines without circles. On the semicircle from the right stack, glue goes along the two lines without circles — between the earlier strips.
- All 32 semicircles. Continue in turn: from the left stack — glue on the lines with circles, from the right — on the lines without circles, each semicircle edge to edge with the one before. Place the last one, from the right stack, without glue.
- Under the book. Put a thick book on the stack for 10 minutes: the glue will set, and the strips won't come apart when the ball opens.
Assemble
- Check the cells. Pick up the stack and open it like a book: diamonds appear between the layers. If it won't open, the glue hasn't set — keep it under the book longer. Close it again.
- Ribbon. Put the stack back on the guide sheet, straight edge along the straight line. Run a line of PVA glue along the straight edge, 3⅛ in long, and press a ribbon folded in half into it: the loop sticks out 1⅛–1⅝ in past the end of the edge — that will be the top of the ball.
- Glue the seam. Apply glue stick to the top semicircle along the two lines without circles, right over the ribbon. This is the seam that closes the ball.
- Close the ball. Lift the stack and open it out into a full circle: the bottom semicircle swings up onto the top one, and the ribbon stays inside. Press the seam along its whole length.
Check
- Hang the ball. Fluff out the cells with your fingers so the ball is even. Hang it by the loop after 15 minutes, once the PVA glue has dried.
Done. The ball is done. Hang it by the loop on a Christmas tree or by a window once the PVA glue has dried. If a cell gets crushed, fluff it out with your finger.
Make it with your phone camera
 PumpkinMedium
 GhostMedium
 Star PiñataHard
 Cobweb with a SpiderEasy
 Paper Chain GarlandEasy
 La CatrinaHard