 VanGami.com
Gratitude Tree
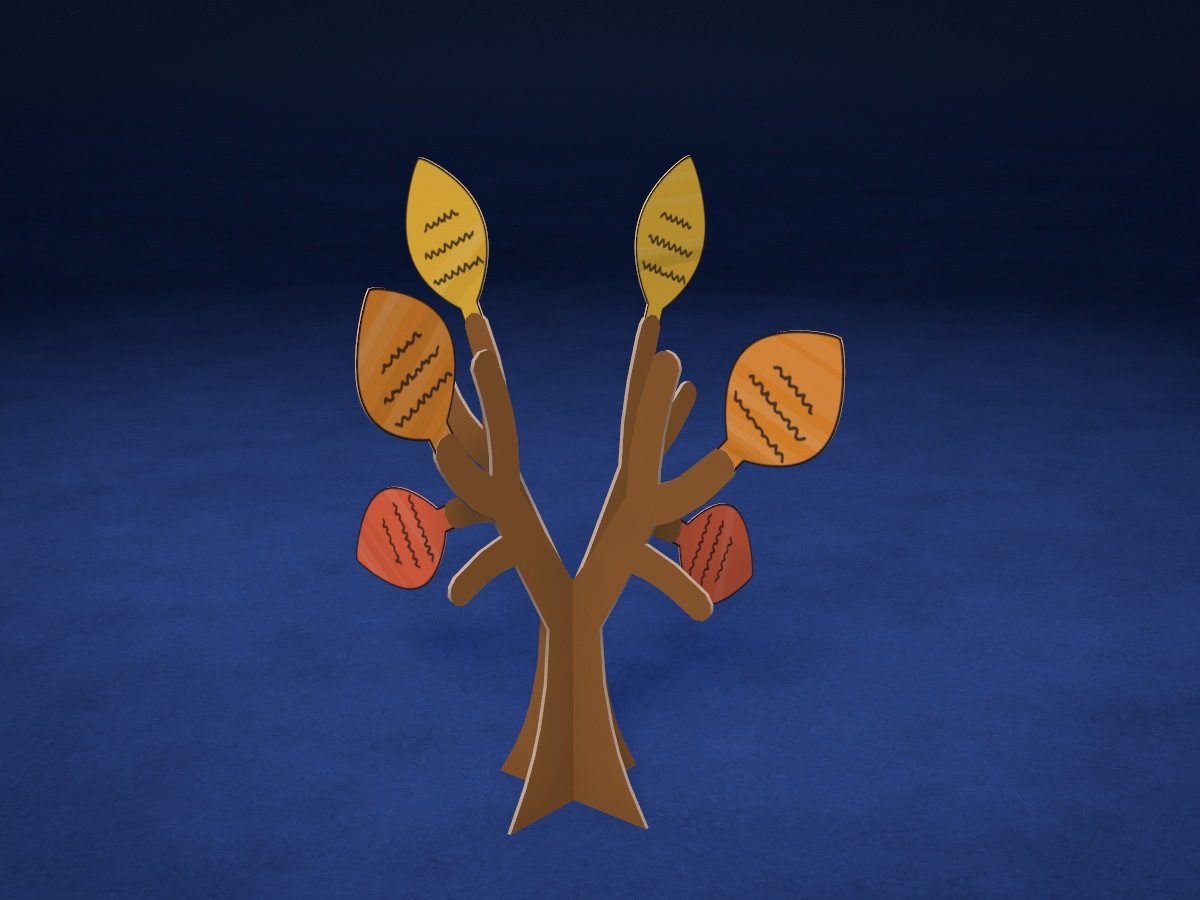
Two tree silhouettes slot into each other crosswise, so the tree stands on its own. On the tips of the branches are six fall leaves, each with something you’re thankful for written on it.
- Easy
- 2 silhouettes
- 6 leaves
- 3 tracing blocks
Make it with your phone cameraLesson code: 5371
On VanGami the template appears over your sheet through your phone camera — no printer needed. Trace it, cut, fold and glue. Below are all the steps in text.
What you’ll need
- 3 Letter sheets — office paper, 80 gsm (20 lb)
- Markers
- Pencil — and eraser
- Scissors — small
- Glue stick — or PVA glue
- Glass — phone stand
Steps
Sheet 1
- Sturdy sheet from two. Apply glue stick over the whole surface of a sheet of printer paper, press a second sheet onto it, and smooth with your palm from the middle to the edges. You'll get a thick sheet — work on that one. Put it back in the same spot, edge to edge; don't move the phone.
- Sheet 1: brown sheet. The brown sheet should be under the camera now. The template has 2 sheets. The sheet is white — the pieces will get their color at the coloring step.
- Tree 1: outline. Trace the tree with a solid line: the trunk, two big branches, six twigs and a narrow slit along the center of the trunk — from the bottom, from the ground up to the middle.
- Tree 2: outline. Trace the tree with a solid line: the trunk, two big branches, six twigs and a narrow slit along the center of the trunk — from the top, from the fork down to the middle.
- Brown. The paper is white, but these parts should be this color: color them in completely, up to the outline. Move the marker in one direction.
Sheet 2
- Sheet 2: white sheet. Remove the previous sheet and put the white sheet in its place, lined up edge to edge. Don’t move the phone — the scale stays the same.
- Leaves: outlines. Trace the six little leaves with a solid line, each with a stem at the top.
- Color: leaves. Two leaves each in yellow, orange and red. Color lightly, without pressing hard: you’ll write on top.
Cut
- Cut out: tree 1. Cut out the tree along the solid line. Cut the slit at the bottom too: scissors straight up the middle of the trunk to the end of the slit. Between the branches, cut in from both sides.
- Cut out: tree 2. Cut out the second tree the same way. Its slit goes down from the fork to the middle of the trunk.
- Cut out: leaves — 6 pcs. Cut out all six leaves with their stems.
Notes
- What you’re thankful for. On each leaf, write one word or a short phrase — something you’re thankful for: family, friends, home, your dog. Write with a black marker or a pen.
Assemble
- Trees slotted crosswise. Stand the second tree upright, fork at the top. Turn the first one crosswise and lower it from above: slit into slit, until the bottoms of both trunks rest evenly on the table.
- Leaves onto the branches. Put a drop of glue on the leaf’s stem and stick it to the tip of a branch, with the writing facing out. The leaf continues the branch. Three leaves go on one tree, three on the other.
Check
- Onto the holiday table. Put the tree on the holiday table. The empty branches are for guests: cut leaves for them from leftover paper, using one of yours as a pattern.
Done. The gratitude tree is done. Put it on the holiday table and let guests add their own leaves — you can cut blank ones from leftover paper.
Make it with your phone camera
 PumpkinMedium
 GhostMedium
 Star PiñataHard
 Cobweb with a SpiderEasy
 Paper Chain GarlandEasy
 La CatrinaHard