 VanGami.com
Pop-up Christmas Tree Card
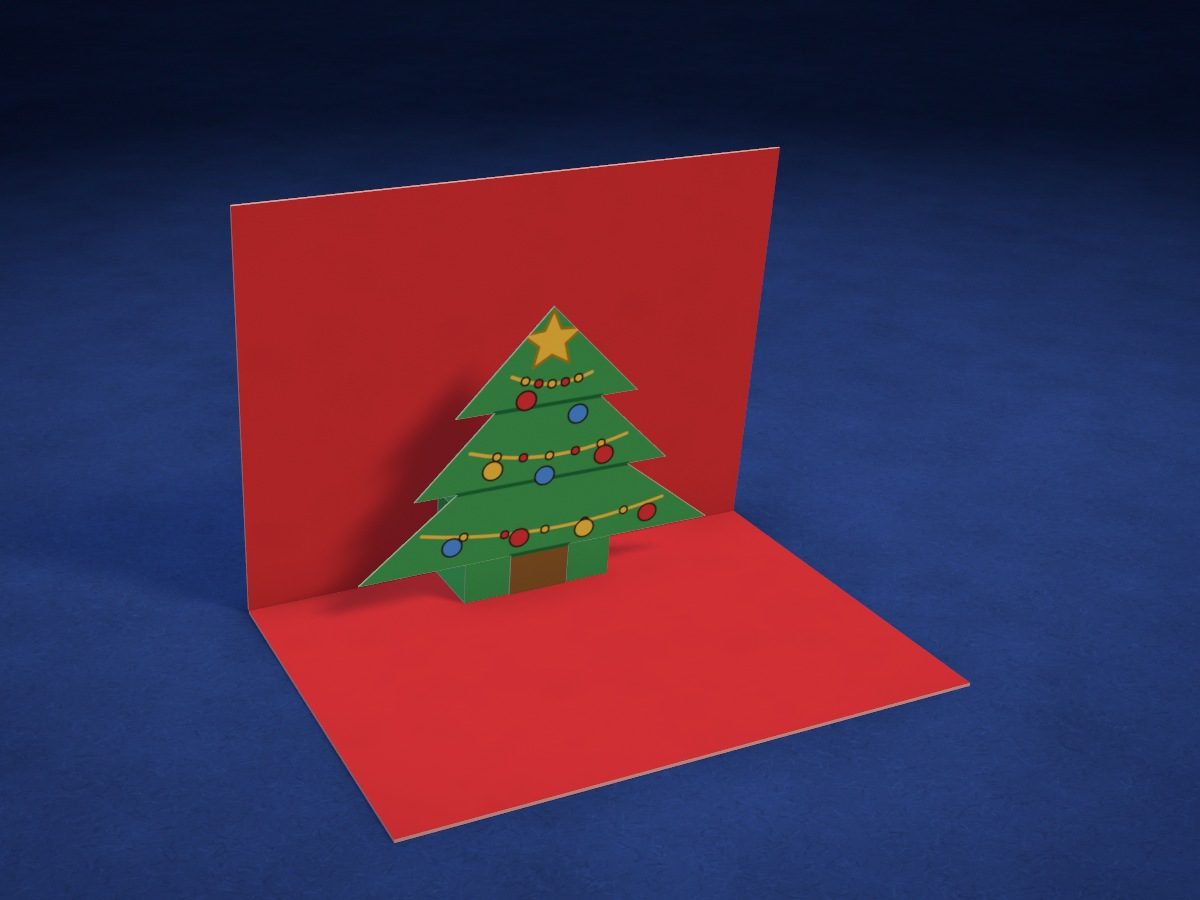
A red card made from a sheet folded in four. Open it and a green Christmas tree with a garland and a star pops up inside; close it and the tree folds flat.
- Easy
- 2 Letter sheets
- 2 pieces
- 8 cm tree
Make it with your phone cameraLesson code: 8590
On VanGami the template appears over your sheet through your phone camera — no printer needed. Trace it, cut, fold and glue. Below are all the steps in text.
What you’ll need
- 2 Letter sheets — office paper, 80 gsm (20 lb)
- Markers
- Pencil — and eraser
- Scissors — small
- Glue stick — or PVA glue
- Glass — phone stand
Steps
Sheet 1
- Sheet 1: green sheet. The green sheet should be under the camera now. The template has 1 sheets. The sheet is white — the pieces will get their color at the coloring step.
- Tree: outline. Trace the tree with a solid line: three stepped tiers and the trunk.
- Tree: drawing. Trace the star, ornaments, garlands and the lines under the tiers — thin, without pressing hard.
- Bridge: outline. Trace the strip with a solid line — you’ll cut along it.
- Bridge: folds. Three lines across, drawn as a dash-dot line, with the numbers 1, 2, 3 next to them. These are folds toward you.
- Green. The paper is white, but these parts should be this color: color them in completely, up to the outline. Move the marker in one direction.
- Color the tree. Star and garlands — yellow, every other light — red, ornaments — red, blue and yellow, trunk — brown, lines under the tiers — dark green.
Sheet 2
- Red: color the sheet (optional). The sheet is white. You can color it in this color all over before marking it out (that takes longer) — or leave it white: the craft will come out white.
- Sheet 2: red sheet. Take the red sheet. You don’t need the camera here — follow the diagram on the screen.
- Base — follow the diagram. You don’t need to draw anything on this sheet: it gets folded in quarters, edge to edge — first along line 1, then along line 2. Fold it when you get to the “Base” stage.
Cut
- Cut out: Christmas tree. Cut out the tree along the solid line. Cut into the inner corners of the tiers from both sides.
- Cut out: bridge. Cut out the bridge along the solid line.
Base
- Fold in half. Fold the red sheet in half crosswise, short edge to short edge. Crease the fold with your fingernail.
- In half again. Fold it in half again, edge to edge — now you have a card. Turn it so the fold is away from you: that way the card will open upward.
- Bridge folds. Fold the bridge along all three lines toward you — lines on the inside — then open it up a little. It should make a little box with no bottom.
Glue
- Bridge into the card. Open the card to a right angle. Put glue on the underside of the long tab at line 1 and glue it to the middle of the bottom page: the end of the tab goes right up against the fold of the card, and line 1 runs parallel to the fold.
- Close it — and the tab sticks. Put glue on the second tab — on the outside, the side without lines. Close the card and press firmly: the tab will stick to the back page exactly where it belongs. Open it — the bridge pops up into a little box.
- Tree onto the bridge. Put glue on the back of the bottom of the tree — the trunk and the lowest tier, up to the height of the bridge. Glue the tree to the front wall of the bridge: the bottom of the trunk level with the bottom page, the tree centered.
Check
- Close and open. Close the card: the tree will fold flat inside. Open it to a right angle — the tree stands up. If it catches on the edge, trim 1/16–⅛ in off the trunk.
Done. Your card is done. Write a greeting on the back page above the tree or on the cover — and give it away.
Make it with your phone camera
 Pop-Up HeartHard
 Surprise BookHard
 Lotus in the WindowHard
 Bouquet of RosesHard
 Love LetterEasy
 Slider CardMedium