 VanGami.com
Love Letter
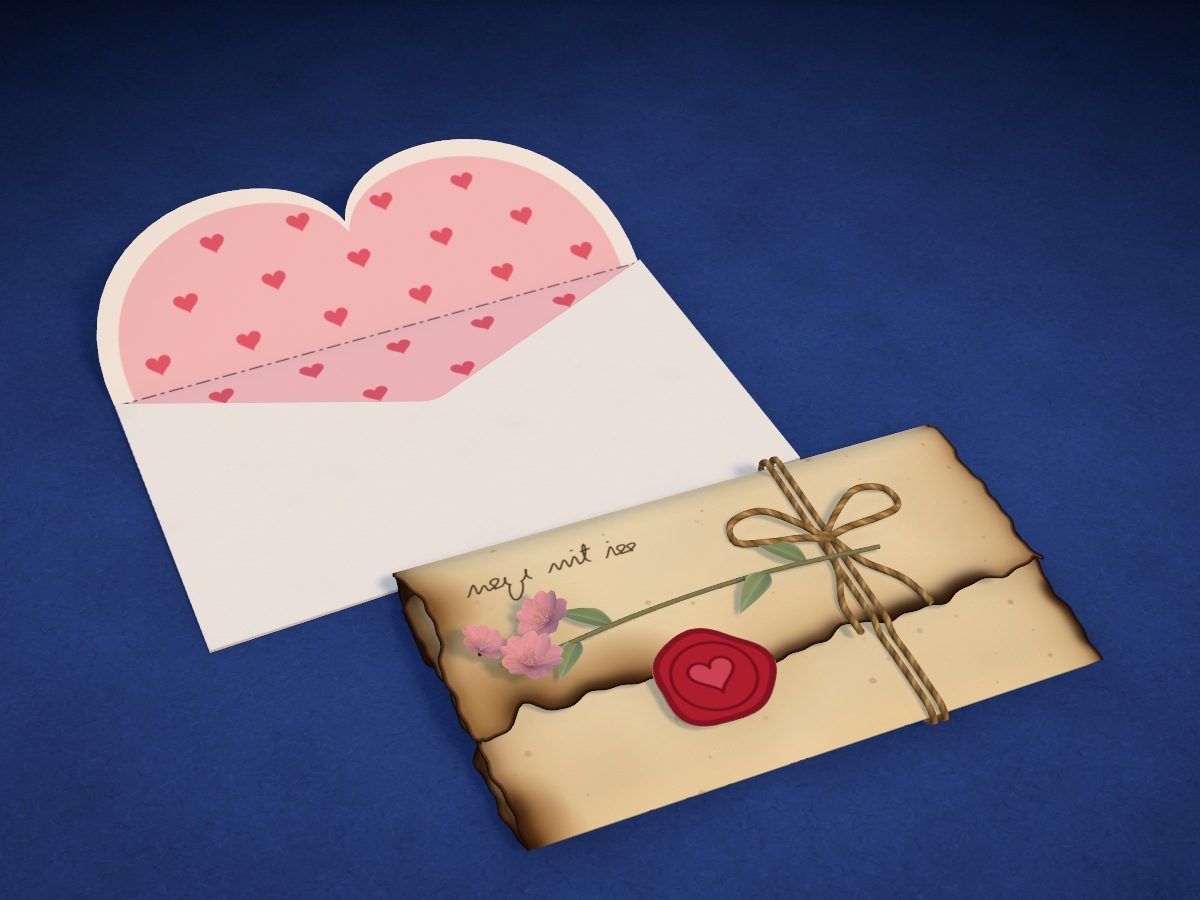
A letter on cream paper with an uneven darkened edge: folded in thirds, sealed with a paper heart seal and tied with twine. With it comes an envelope with a heart-shaped flap: the letter fits inside whole.
- Easy
- 2 Letter sheets
- 3 pieces
- 2 folds in the letter
- 70 cm of twine
Make it with your phone cameraLesson code: 5295
On VanGami the template appears over your sheet through your phone camera — no printer needed. Trace it, cut, fold and glue. Below are all the steps in text.
What you’ll need
- 2 Letter sheets — office paper, 80 gsm (20 lb)
- Markers
- Pencil — and eraser
- Ruler — 8–12 in
- Scissors — small
- Glue stick — or PVA glue
- Pen — for writing the letter
- Brown pencil or pastel — for darkening the edge of the letter
- Thread or string
- Dried twig or flower — optional
- Glass — phone stand
Steps
Sheet 1
- Sheet 1: white sheet. The white sheet should be under the camera now. The template has 2 sheets.
- Letter: outline. Trace the wavy line — the edge of the letter. You don't need to copy every little tooth: unevenness only helps.
- Letter: folds. Don't draw the two lines all the way across the sheet: make short marks at both edges and add the numbers — 1 for the lower one, 2 for the upper one. Darken the edge later and the marks won't show.
- Letter: ruled lines. Draw thin lines with a ruler, barely pressing: you'll write the letter along them and erase them afterward. If you write straight without lines, skip this step.
- Seal: outline. Trace the uneven circle to the right of the letter — that's the seal.
- Seal: imprint. Inside the circle — a ring and a heart.
- Letter: burnt edge. With a brown pencil or pastel, shade a band along the edge about a finger wide: darker near the line, lighter toward the middle; blend the pastel with your finger. With a marker — only a 1/16–⅛ in strip right along the line.
- Color: seal. Color the whole seal red, leaving the heart lighter. Outline the ring and the heart in burgundy.
Sheet 2
- Sheet 2: white sheet. Remove the previous sheet and put the white sheet in its place, lined up edge to edge. Don’t move the phone — the scale stays the same.
- Envelope: outline. At the top are the two arcs of the flap, narrow glue flaps on the sides, and the pocket with a V-notch at the bottom. Use a ruler for the straight lines.
- Envelope: folds. Trace lines 1 (side flaps) and 2 (pocket) with a dash-dot line. For the top line (the fold of the heart flap), trace only short tick marks at the ends: it runs over the pink area, and pencil under the color can’t be erased.
- Envelope: lining. Mark out the pink area: the flap with a white border along its edge and the corner below it. Inside are little hearts — you can draw fewer than in the sample.
- Color: lining. Color the flap and the corner pink and the little hearts red: on the finished envelope they will make one heart. On thin paper use colored pencils — marker will show through.
Cut
- Cut out: letter. Cut out the letter along the wavy line in small, uneven snips. You can also tear the edge by hand: a ragged edge looks older.
- Cut out: seal. Cut out the seal. It doesn’t need to be a perfect circle — the edge of sealing wax is always uneven.
- Cut out: envelope. Cut out the envelope along the outline as one piece. Cut the V-notch at the bottom with two straight cuts toward the middle.
Letter
- Edge on the back. Flip the sheet over and darken the edge the same way on the back side: that side will be on the outside of the folded letter.
- Write the letter. Lay the sheet with the ruled lines facing up and write the letter with a pen: the greeting goes at the top and the signature at the bottom right. When the ink dries, erase the pencil lines.
Fold
- Bottom third — up. Line up a ruler with tick marks 1 and fold the sheet toward you along the ruler’s edge: the bottom third lies over the text and stops 3/16 in short of tick marks 2. Crease the fold with your fingernail.
- Top third — down. Again, with the ruler, fold along tick marks 2: the top third covers the bottom one like a flap. The letter is now folded in thirds, with the text inside.
Seal
- Address it. On the flap, write who the letter is for — one line near the fold, on the left. The seal will go at the edge, and the twine will run on the right.
- Seal. Flip the seal over and apply glue to the top half only. Glue it to the edge of the flap, left of center: half of the seal sits on the flap and half hangs over the letter.
- Twine. Leave 5⅞ in at the end of the twine, then wrap it around the letter twice: the loops run parallel to the short edges, to the right of the seal. Tie a knot on top of the flap, then a bow; trim the tails to 1⅛ in.
- Sprig. Slip a dry sprig or flower under the twine — stem pointing right, flower toward the left edge, below the address. No sprig? Skip this step.
Envelope
- Side flaps. Lay the envelope pink side up. Fold the two narrow side flaps toward you along the lines marked 1 and crease the folds.
- Pocket. Apply glue to the top of both flaps. Fold the bottom part up along line 2 and press it onto the flaps — now you have a pocket with a V-notch.
- Heart flap. Line up a ruler with the tick marks at the base of the top flap and fold the flap toward you along the ruler’s edge: when closed, it completely covers the notch. Crease the fold and open it — the pink arcs and the pocket’s corner come together into a heart.
Check
- Letter and envelope. Lay the letter on the open envelope — it looks nice that way for gifting and filming. Or slip it into the pocket and close the heart flap.
Done. The letter is ready. Put it in the envelope, close the heart flap — and it’s ready to give.
Make it with your phone camera
 Pop-Up HeartHard
 Surprise BookHard
 Lotus in the WindowHard
 Bouquet of RosesHard
 Slider CardMedium
 Cake with CandlesHard