 VanGami.com
Cone Doll: Little Owl
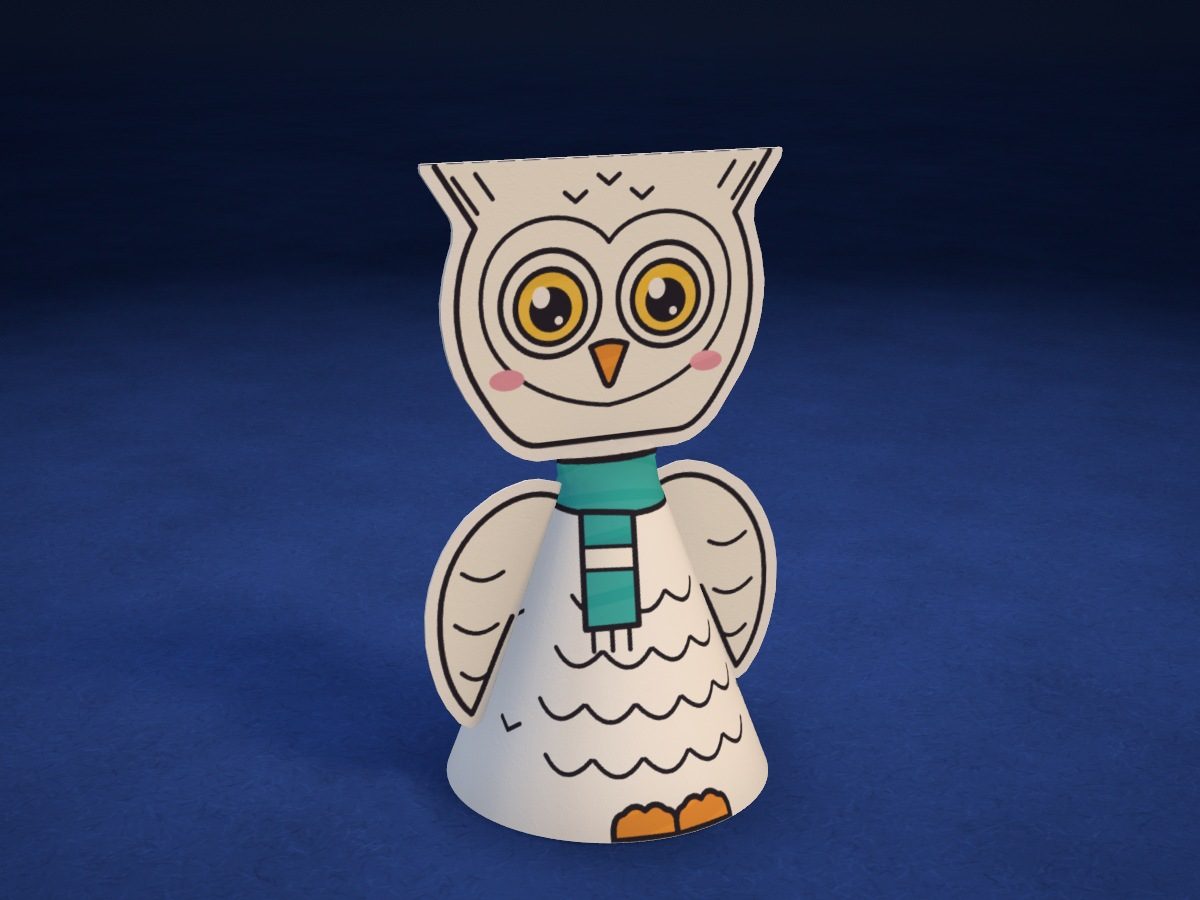
A little snowy owl, 3½ in tall: the body is a paper cone, the head is folded from two halves, and the two wings are on tabs. It is white, with big yellow eyes and a turquoise scarf, so there is almost nothing to color.
- Easy
- 9 cm tall
- 4 pieces
- 1 Letter sheet
Make it with your phone cameraLesson code: 9346
On VanGami the template appears over your sheet through your phone camera — no printer needed. Trace it, cut, fold and glue. Below are all the steps in text.
What you’ll need
- Letter sheet — office paper, 80 gsm (20 lb)
- Markers
- Pencil — and eraser
- Scissors — small
- Glue stick — or PVA glue
- Glass — phone stand
Steps
Trace
- Body: outline. Trace the solid line: the two straight sides from the pointed corner and the arc at the bottom. You'll cut along it.
- Body: drawing. Copy the drawing with thin lines. Four more lines: along the straight right side, the edge of the glue strip (don’t color the strip); near the sharp corner, a short arc, the neck line; and on the side, short straight marks: you’ll glue the tabs to them.
- Head, left wing, and right wing: outlines. Trace the 3 pieces with a solid line: head, left wing, right wing. You’ll cut along these lines.
- Head, left wing, and right wing: folds. Draw dashed lines: one across the flat top of the head (the head will be folded in half along it), one at the left wing, and one at the right wing. Don’t cut along dashed lines.
- Head, left wing, and right wing: drawing. Copy the drawing with thin lines: the picture on the screen is your guide. It doesn't have to be exact to the millimeter.
Color
- Color: body. Scarf — turquoise; don’t color the white stripes at its end. Feet — orange. The body stays white; go over the feathers and the drawing lines in black.
- Color: head and wings. Eyes — yellow; pupils — black; leave the highlights white. Beak — orange; blush — pink. The head and wings stay white; go over the feathers and outlines in black.
Cut
- Cut out: body. Cut out the body along the outline: cut the straight sides in one go, and the curve by turning the sheet.
- Cut out: head, left wing and right wing — 3 pcs. Cut out the head in one piece — face and back of the head together; don’t cut along the dashed line on top. Cut out the wings together with their tabs.
Glue
- Roll up the body. Apply glue to the narrow strip along the right edge. Roll the piece into a cone with the drawing facing out and lay the left edge over the strip up to the line: the bottom should become an even circle. Press the seam.
- Head on top. Flatten the top of the body with your fingers down to the neck line — the seam goes at the back. Lay the head face down, unfolded, and apply glue to the whole back side. Place the flattened top on the half with the face — the neck line along the bottom edge of the head — and cover it with the back of the head, folding along the dashed line. Hold for 20–30 seconds.
Assemble
- Left wing. Bend the wing’s tab back along the dashed line, apply glue to it and press it to the left side of the body: the wing sticks out a little to the side, with the tip pointing down. The fold goes on the mark on the side. Hold for 20–30 seconds until the glue sets.
- Right wing. Glue the right wing to the right side the same way: the owl looks like it has lifted its wings. The fold goes on the mark on the side. Hold for 20–30 seconds until the glue sets.
Done. The owl is done: it stands on its own, with its wings raised and the scarf under the head. Put it on a shelf or give it as a gift.
Make it with your phone camera
 Chibi NinjaHard
 Chibi StandeeMedium
 Capybara with a TangerineHard
 Chibi Cube: FoxMedium
 Little RobotMedium
 Little FoxHard