 VanGami.com
Chibi Cube: Fox
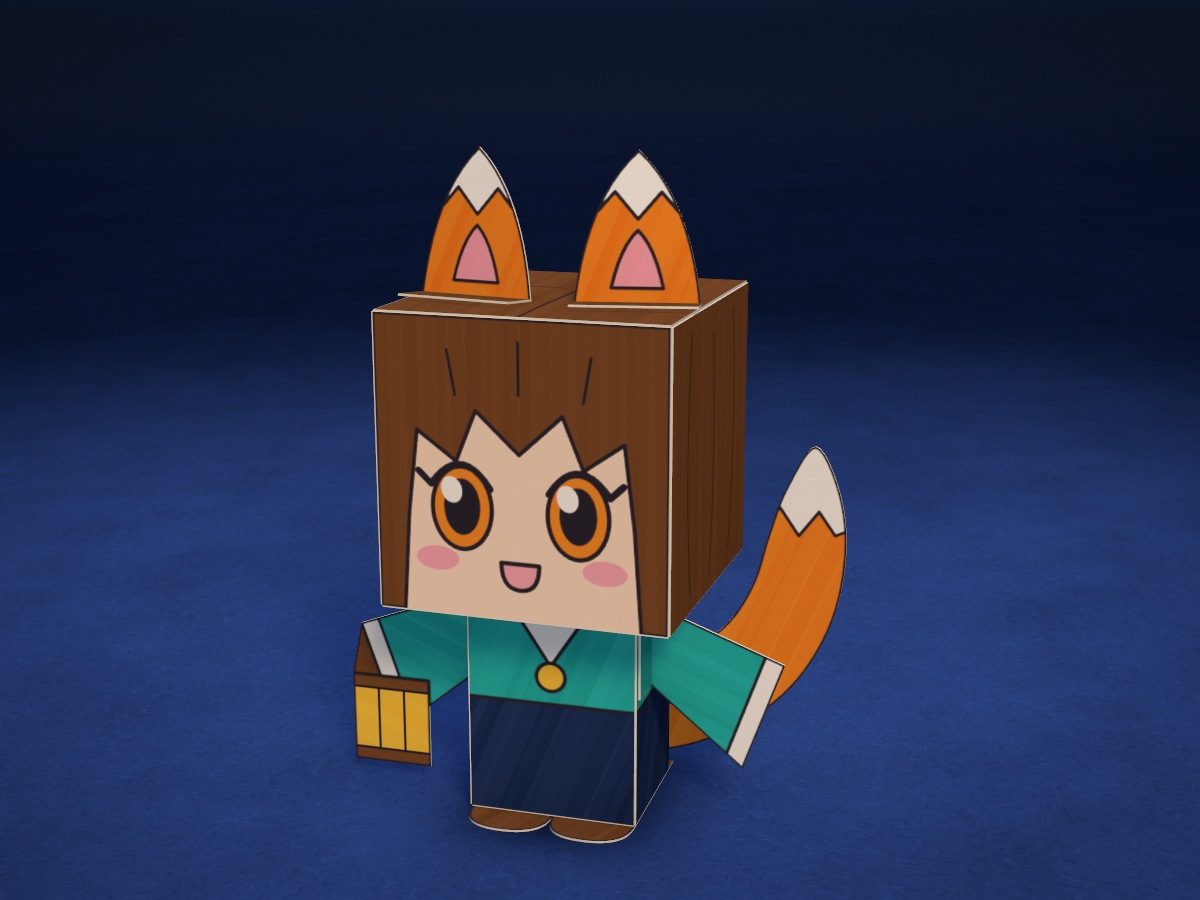
A chibi fox 4¾ in tall, made of two paper boxes: a big cube head with a face and bangs, and a small body in a turquoise cape. The ears, tail and the sleeve with the lantern are flat pieces.
- Medium
- 2 boxes
- 20 tabs
- 1 Letter sheet
Make it with your phone cameraLesson code: 6654
On VanGami the template appears over your sheet through your phone camera — no printer needed. Trace it, cut, fold and glue. Below are all the steps in text.
What you’ll need
- Letter sheet — office paper, 80 gsm (20 lb)
- Markers
- Pencil — and eraser
- Ruler — 8–12 in
- Scissors — small
- Glue stick — or PVA glue
- Empty pen — to score the folds
- Glass — phone stand
Steps
Trace
- Head, face: outline. Two squares, one above the other, and three tabs on the bottom one. Using the screen, mark dots at all the corners, then connect them with a ruler — it's faster and neater.
- Head, face: folds. Draw the line between the squares and the lines at the tabs as dashed lines: you don't cut along them. Number the tabs 1, 2 and 7 — that's the gluing order.
- Head, face: drawing. In the bottom square — the face: jagged bangs with strands along the cheeks, oval eyes with a pupil and a highlight, eyelids, blush and a mouth. In the top square — a hair part with two strands and two short lines: the ears will stand on them.
- Head, sides: outline. Two squares in a row and five tabs: two on top, two on the bottom and one on the right. Again, dots at the corners — then lines with a ruler.
- Head, sides: folds. Draw the line between the squares and the lines at the tabs as dashed lines. Numbers: 4 and 5 on top, 3 on the right, 8 and 9 on the bottom.
- Head, sides: strands. In each square, draw three strands freehand — long lines from top to bottom. They don’t need to be exact.
- Head, bottom: outline. Two squares, one above the other, and one tab on top.
- Head, bottom: folds. Make the line between the squares and the line at the tab dashed. Write the number 6 on the tab.
- Head, bottom: strands. In the top square, below tab 6, draw three more strands just like those. The lower square is the bottom of the head, and it stays blank.
- Body: outline. Cross shape: a strip of four sides, with a lid above the left one, a bottom below it, and seven tabs. Dots at the corners, then lines with a ruler.
- Body: folds. Draw the folds as dashed lines and number the tabs 1 through 7.
- Body: cape and skirt. Draw a line across all four sides — the edge of the cape. On the left side, a triangle collar and a round clasp; on the third side, at the bottom, a small window for the tail.
- Small parts: outlines. Trace six pieces: two ears, a sleeve, the feet, the tail and the sleeve with the lantern.
- Small parts: folds. On the ears and sleeves, the tab is set off by a dash-dot line — that's a valley fold (fold toward you).
- Small parts: drawing. Ears and tail get a jagged white tip, and the ears also get an inner part. Sleeves get a cuff; the lantern gets a base, a lid, a handle and two stripes; the feet get the toes and heels of the shoes.
Color
- Color: face. Color the bangs and the top of the head chestnut, the eyes orange, and the blush and mouth pink; color the face skin tone or leave it white. Pupils, eyelids and strands go in black; don’t color the highlight in the eye.
- Color: sides of the head. Color both squares chestnut with the wide side of the marker, top to bottom. Then go over the strands on top in black.
- Color: piece with tab 6. Color the top square chestnut and the strands on top black. The lower square is the bottom, and it stays white.
- Color: body. Above the line — turquoise, below — navy blue. Leave the collar and the tail window white, and make the clasp yellow.
- Color: small parts. Ears and tail — orange, white tips, pink insides on the ears. Sleeves — turquoise, lantern — yellow; its base, lid and handle, the toes and heels of the shoes, and the ear tabs — chestnut.
Cut
- Cut out: head, face. Cut out the piece together with the tabs. Cut up to the tab corners from both sides.
- Cut out: head, sides. Cut out the strip of two squares together with its five tabs.
- Cut out: head, bottom. Cut out the two squares together with the tab.
- Cut out: body. Cut with scissors along the solid line. Turn the sheet, not the scissors — the cut will come out neater.
- Cut out: small pieces — 6 pcs. Cut out six pieces. Tail and feet — turn the sheet as you cut; between the shoe toes — two cuts that meet from opposite sides.
Head
- Fold the head pieces. Score all the dashed lines with an empty pen along a ruler. Then fold each line away from you, drawing side out — tabs too.
- Three sides. Take the piece with the face and the strip of sides. Apply glue to tab 1 — to the right of the face — and glue the strip’s left edge, the one without a tab, to it from the inside: the corners should line up.
- Fourth side. Apply glue to tabs 2 and 3 and press the third piece onto them: the chestnut square closes the head on the left, tab 6 is at the top, and the bottom hangs down.
- Lid. Fold tabs 4, 5 and 6 inward and apply glue. Lower the lid onto them and press from the inside with your finger — through the open bottom.
- Bottom. Flip the head so the lid is down. Fold tabs 7, 8 and 9 inward, apply glue, close the bottom and press with your palm for 10 seconds.
Body
- Fold the cross-shaped piece. Set the head aside. On the body, score and fold all the lines and the seven tabs away from you, the same way.
- Sides. Roll the four sides into a tube, drawing side out. Apply glue to tab 1 and glue it from the inside to the edge of the side with the collar.
- Lid and bottom. Tabs 2, 3 and 4 — fold in, glue, lid: press them from the inside with the blunt end of a pencil. Flip it over; tabs 5, 6 and 7 — fold in, glue, bottom.
Assemble
- Feet. The body lies bottom up. Apply glue to the bottom and glue the feet on, drawing side against the bottom: the shoe toes stick out on the collar side. Flip the body onto its feet.
- Head onto the body. Apply glue to the body’s lid and set the head on it bottom down, centered: the head is wider than the body and sticks out on all sides. The face points the same way as the collar.
- Ears. Fold the ear tabs toward you, apply glue to the underside and glue them on top of the head: the fold of the ear goes on the short line, and the tab points toward the face. The ears stand up and face forward.
- Sleeves and lantern. Fold the sleeve tabs toward you, apply glue to the back and glue them to the sides of the body right under the head, near the front edge. The sleeve with the lantern goes on the left; the lantern hangs down.
- Tail. Turn the fox with its back to you. Apply glue to the base of the tail on the drawing side and stick it onto the white patch at the bottom of the back. The tail goes sideways — toward the sleeve without the lantern — and up: the tip peeks out beside the head.
Done. The fox is done. Let the glue dry for 10 minutes, then it can go on the shelf.
Make it with your phone camera
 Chibi NinjaHard
 Chibi StandeeMedium
 Capybara with a TangerineHard
 Little RobotMedium
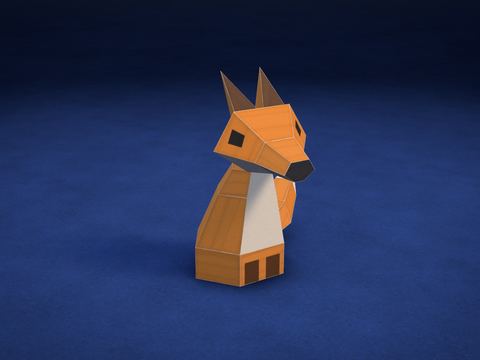 Little FoxHard
 CrystalEasy