 VanGami.com
Calendar Card
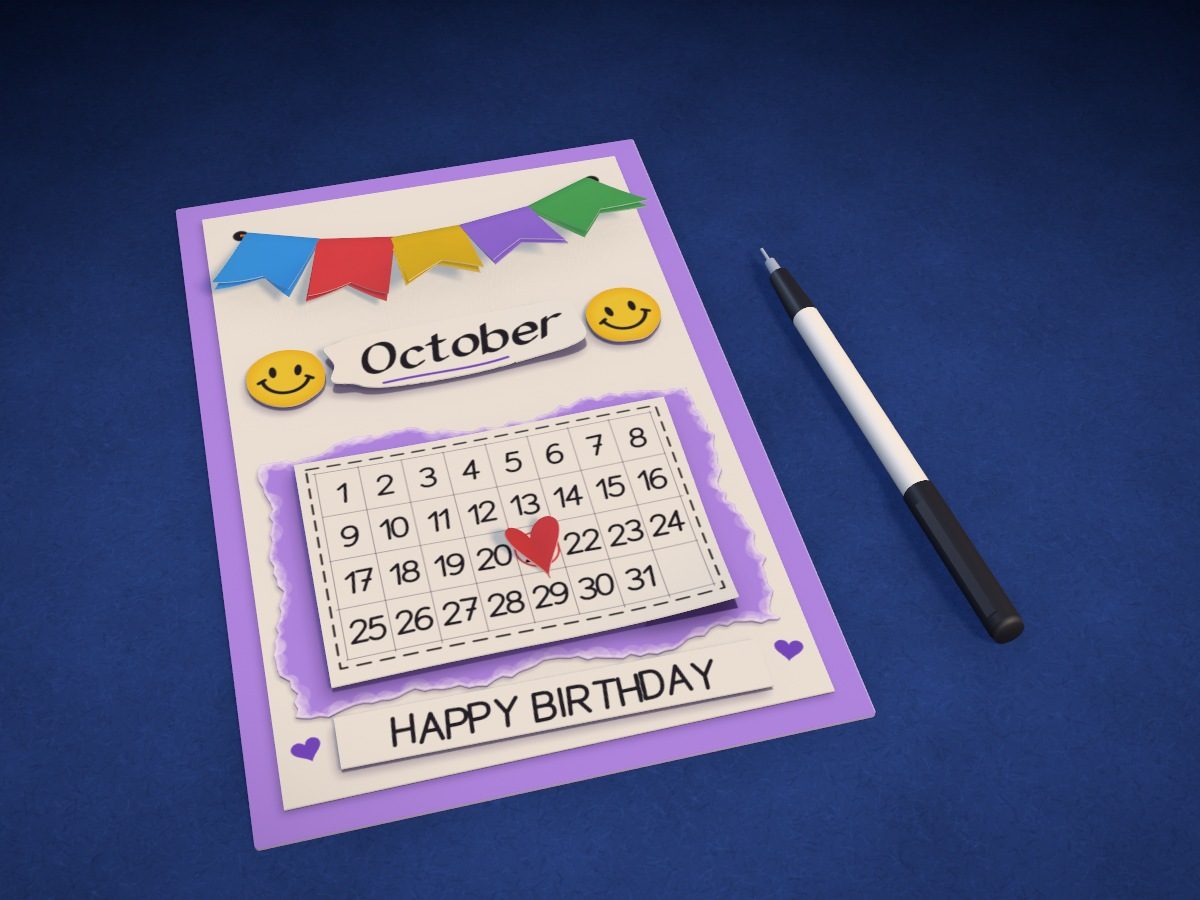
A card on a lilac backing: a string of flags on a thread, a calendar page with the month’s dates on a torn underlay, and a folded little heart on the birthday date. Two white Letter sheets, markers, thread and a black fineliner.
- Medium
- 14 pieces
- 5 flags
- 31 dates in grid
- 2 Letter sheets
Make it with your phone cameraLesson code: 6641
On VanGami the template appears over your sheet through your phone camera — no printer needed. Trace it, cut, fold and glue. Below are all the steps in text.
What you’ll need
- 2 Letter sheets — office paper, 80 gsm (20 lb)
- Markers
- Pencil — and eraser
- Ruler — 8–12 in
- Scissors — small
- Glue stick — or PVA glue
- Tape — two pieces
- Regular markers
- Thread or thin yarn — 7⅞ in
- Glass — phone stand
Steps
Trace
- Calendar page: outline. Fold the white sheet in half, short edge to short edge, then unfold it. Draw only below the fold: use the ruler to trace a 3¾ × 2⅝ in rectangle, with its top edge 3/16 in below the fold.
- Calendar page: grid. Use the ruler to draw nine lines from top to bottom and five across — you’ll get 32 cells. Don’t write the numbers in pencil: add them directly with the fineliner.
- Labels: outlines. Trace two labels: a 3¾ × ½ in strip using the ruler, and a cloud with a wavy edge — freehand.
- Labels: lettering. Write your month in the cloud and the greeting in the strip. Keep the lines thin for now, in pencil.
- Flags and smileys: outlines. Trace five ¾ × 2⅜ in flags with a notch at each end, using the ruler. Trace two circles around a coin or lid about ¾ in wide, and the heart freehand.
- Smileys: faces. Draw eyes and a smile on the smileys. Leave the flags and heart blank — you’ll color them in the Color stage.
Color
- Calendar page: numbers. Write the numbers of your month in black fineliner — in order, eight per row. Draw a red circle around the birthday date and a dashed frame around the grid.
- Color: labels. Trace the letters with black fineliner, and the month name bolder, in two passes. Draw a purple line under it.
- Color: flags and smileys. Color the five flags in five different colors, the smileys yellow and the heart red. Trace the eyes and smiles with black fineliner.
Blanks
- White sheet — along the fold. Cut the white sheet along the fold. Set the clean half aside: it will become the card’s white sheet.
- Trim the white sheet. On the clean half, use the ruler to measure ⅝ in from one short edge and from the long edge on the cut side. Draw two lines and cut off the strips: what’s left is the card’s white sheet, 4⅞ × 7⅞ in.
- Second sheet in half. Fold the second sheet in half, short edge to short edge, crease the fold and cut along it. One half is the card base; you’ll tear the calendar backing from the other.
Cut
- Cut out: calendar page. Cut out the calendar page along the line. The picture shows a whole sheet, but you have the half with the drawing.
- Cut out: labels — 2 pcs. Cut the strip along its straight lines and the cloud along the wavy line, turning the paper as you go.
- Cut out: flags and smileys — 8 pcs. Cut out five flags, two circles and the heart. Make the flag notches with two short cuts toward the middle.
- Backing with a torn edge. Place the calendar page on the second half and trace around it in pencil, leaving a margin: ⅜ in on the sides, 3/16 in on the top and bottom. Tear off the excess in four strips, each from edge to edge: the edge will come out uneven.
- Color the base and the backing. The paper is white, but the base and the backing are lilac. With a purple marker, color a ⅝ in band along all the edges of both: the white sheet will cover the middle of the base, and the calendar page will cover the middle of the backing.
Fold
- Flags and heart. Fold each flag in half with the color outside so the notches at the ends line up. Fold the heart in half with the color inside, then open it slightly.
Assemble
- Two holes. Place the white sheet upright and mark two points: ⅜ in from the top edge and ⅜ in from the sides. Poke through them with the pencil tip.
- Thread. Pass the thread ends through the holes from front to back: between them the thread sags ⅜–⅝ in. Flip the sheet over and tape the ends down.
- White sheet onto the base. Apply glue to the back of the white sheet — along the edges and across the middle — and glue it to the middle of the base. The margins are the same on all sides, about ¼ in.
- Flags onto the thread. Open a flag, apply glue inside, put its fold over the thread and press the halves together. Place all five flags from hole to hole, evenly spaced.
- Backing and calendar page. Glue the torn backing in the center, ¾ in from the bottom edge of the white sheet: the greeting will go under it. Glue the calendar page on top, with glue only in the middle of the page so the edges stay lifted.
- Month and smileys. Glue the cloud with the month name between the flags and the calendar, centered. Glue the smileys to its left and right.
- Greeting. Glue the greeting strip under the calendar, along the bottom edge. In the bottom corners of the sheet, draw two small hearts with the purple marker.
- Heart on the date. On the back of the heart, apply glue in a 1/16–⅛ in strip along the fold — a drop of PVA glue (white glue) holds better — and press the fold onto the birthday number. The halves stay lifted.
Done. The card is done. The heart stands on the birthday date — all that’s left is to sign the back.
Make it with your phone camera
 Pop-Up HeartHard
 Surprise BookHard
 Lotus in the WindowHard
 Bouquet of RosesHard
 Love LetterEasy
 Slider CardMedium